How to Design a Kitchen Workflow Triangle: A Complete Guide
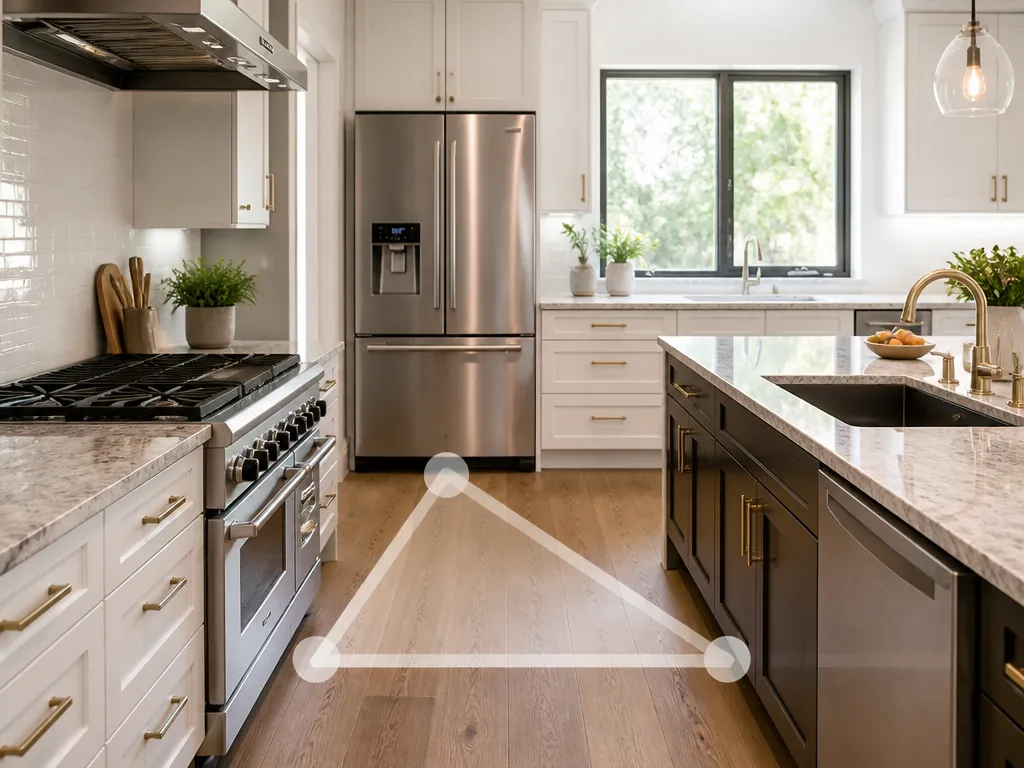
A kitchen workflow triangle reduces steps and backtracking while you cook, clean, and prep. If you move from the sink to the stove to the fridge repeatedly, you end up crossing other people and carrying ingredients across the room. A practical triangle uses distance checks, clear zones, and a 30-minute trial run to fit the way your kitchen actually works.
Workflow triangle design places the three main work points – refrigerator, sink, and cooktop or range – close enough for most tasks to travel in short loops. Aim for roughly 4 to 9 feet total distance for the three sides, with each side typically about 1.5 to 7 feet in a workable layout. Keep clear lanes so you can move between points without cutting across other people.
Key Takeaways
- Pick your three nodes. Use the fridge, sink, and cooktop as the triangle points for most daily cooking tasks.
- Set distance targets. Keep the loop compact.
- Protect an open path. Leave a clear walkway so you can cook without constantly stopping or shuffling.
- Use zones deliberately. Prep, clean, and cook areas should function as separate stages rather than one cluttered surface.
- Match the layout type. Galley and U-shaped kitchens need triangle adjustments because traffic is constrained.
- Test the layout. Run a real meal workflow and adjust the setup before committing to larger changes.
How To Design a Kitchen Workflow Triangle For Efficiency
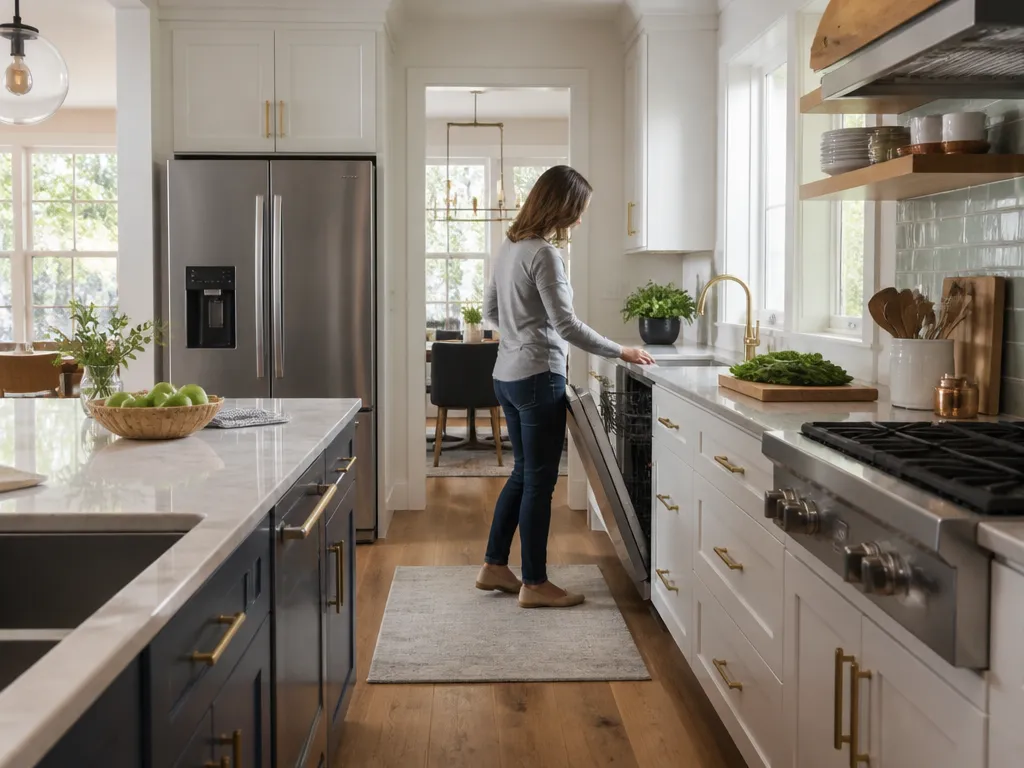
Treat the workflow triangle as a movement system, not a drawing exercise. When you cook dinner, your hands and ingredients should follow a short, predictable loop between the fridge for gathering, the sink for rinsing and cleaning, and the cooktop for heating and assembly. If you weave around appliances, children, or a second cook, the triangle is failing even if the distances look close enough on paper.
Start with accurate measurements and a list of your actual repeat tasks. Measure the clear, inside edge-to-edge distance between work points – counter-to-counter matters more than cabinet-to-cabinet. Then write down the five movements you make most often each week, such as dumping pasta water, rinsing produce, microwaving after prep, or loading the dishwasher.
Use this step-by-step method:
- Mark the three work points. Use the refrigerator, sink, and cooktop or range as the triangle corners.
- Define the counter landing. For each point, choose the nearby counter space where food or cookware can sit at hand height.
- Measure clear travel gaps. Measure the likely path between landing zones, not the narrowest spot on the floor.
- Check the loop distance. Add the three side distances and compare the result with the compact target range.
- Protect a traffic-safe lane. Confirm that you can walk the route without crossing the main circulation path.
- Place staging items. Keep the trash can, dish tools, and frequently used small appliances near the correct triangle edge so you do not leave the loop.
- Run a trial workflow. Prepare one dish and note every turn, backtrack, or step into someone else’s path.
A fridge on one wall and a sink on the opposite wall may meet the distance targets while still creating an awkward route around a peninsula. In that case, improve the staging and lane plan first. Move the usable landing counter, or shift the dishwasher and trash so the sink edge of the triangle functions during real tasks.
The triangle should serve the handoff points, not merely the appliances. If you can reach the cooktop only from the wrong side of the stove, or if the dishwasher door blocks the sink landing, that triangle side is effectively lost.
| Triangle Corner Pair | Typical Job You’re Optimizing | What to Place Nearby | What to Avoid |
|---|---|---|---|
| Fridge to Sink | Rinse, drain, prep cleanup | Cutting board zone, dish soap, scrub tools | Long carries across the room |
| Sink to Cooktop | Clean-to-heat transition | Pots, rinsed ingredients landing spot | Tight corner where you bump legs |
| Cooktop to Fridge | Store leftovers, grab staples | Spill-safe shelves, grab-and-go containers | Needing to backtrack through traffic |
Which Triangle Points Matter in Your Kitchen Layout
Most kitchen workflow triangles have three anchors: the refrigerator, sink, and cooktop or range. An island can become a useful fourth staging point, but adding it usually increases steps unless it serves as the main surface for prep and plate assembly. The practical logic is where food changes state: cold to clean, clean to heat, and cooked food to storage.
Your primary cooking point may differ from the appliance label. If you use the oven constantly and rarely sauté, the working corner may be the oven door plus its nearby counter landing. If the microwave over the range handles much of your cooking, it may influence the cook edge as well. The useful corner is the appliance and reachable work surface you use together.
Choose the primary cooking surface by frequency rather than preference. Someone who mainly cooks on the stovetop should use the cooktop as the triangle corner. Someone who bakes daily and rarely uses the burners may get better results by treating the oven and its adjacent counter as the working corner.
Do not label a corner by appliance location alone. A sink may sit near the cooktop, but a dishwasher between them can block the lane. The triangle can be correctly measured and still fail when the path is interrupted during the hours you cook.
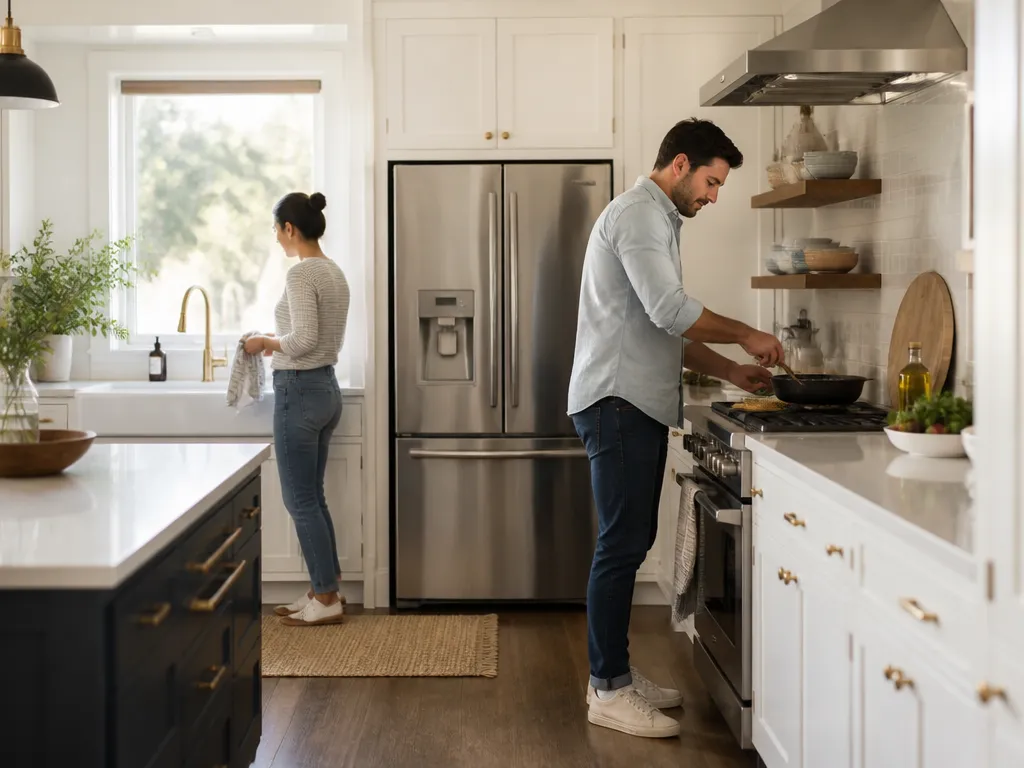
Household traffic also changes the design. One cook needs a clear lane; two cooks need separate lanes or distinct zones. If someone regularly opens the dishwasher while another person stirs a pot, leave enough room for both actions or expect constant stops and shuffling.
What Distance Targets Keep Work Loops Efficient
Distance targets establish a useful baseline, but usable counter landing space determines how the layout performs. A compact triangle with nowhere to place a cutting board, pot, or grocery item forces longer carries. A slightly larger triangle with clear counters can work better.
Smaller kitchens may fit within the compact target but need careful staging. Larger kitchens can remain efficient when the triangle edges have enough working counter, storage, and landing space to prevent backtracking.
Use these checks while measuring:
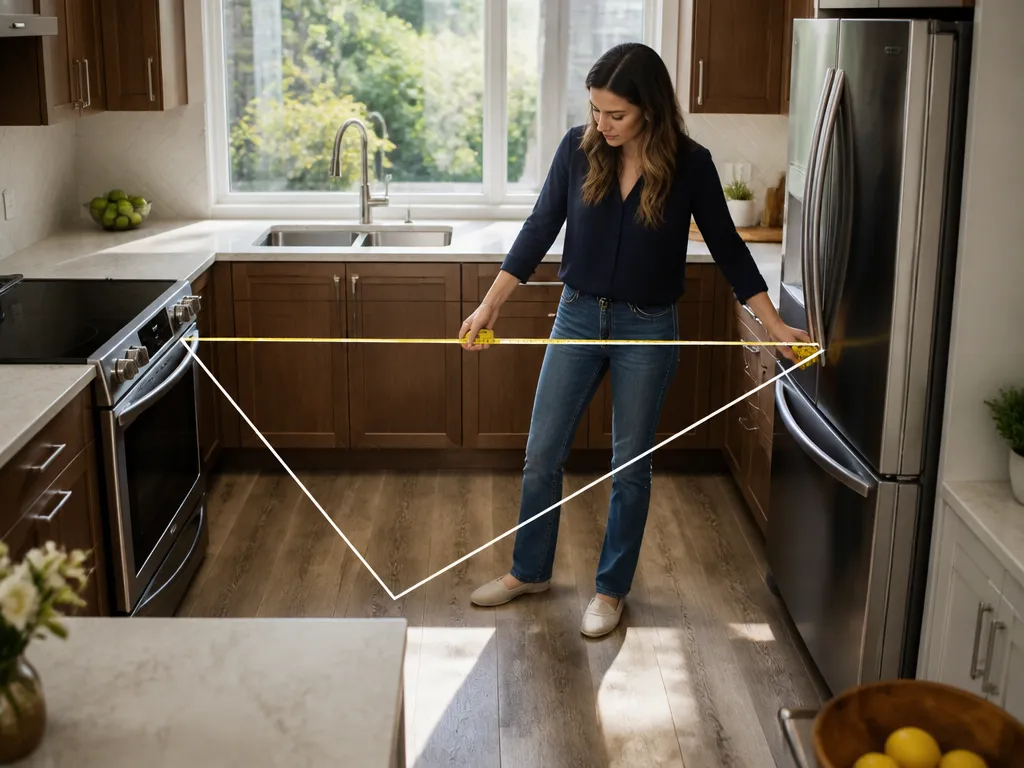
- Side distance check. Compare each corner-to-corner side with the workable range.
- Total loop check. Add the three sides and compare the result with the compact loop target.
- Landing capacity check. Give each corner enough counter space for at least one cutting board or a small stack of items during transitions.
- Obstacle check. Account for doors, drawer pulls, and appliance overhangs. A triangle can fail when you cannot open the dishwasher or when a handle projects into the lane.
An 8-foot sink-to-cook distance is outside the compact side target but may still work if a wide, continuous counter creates a clear food strip between the two points. By contrast, distances within range will not help if a tall pantry blocks the sink landing or prevents you from turning toward the drainboard.
Count how often you cross the same corridor during a typical meal. Three or more crossings usually point to a staging problem, a loose triangle, or a missing prep zone near the fridge edge.
Distance is not the same as effort. A 6-foot path with two obstacles can feel worse than a 7-foot clear path. Prioritize open lanes and usable counter surfaces over perfect measurements.
How To Avoid Cross-Traffic at the Work Triangle
Cross-traffic turns a workable triangle into a daily obstruction. It occurs when the shortest work loop cuts through the route from the entry to the dining area, or when several people use the same narrow space. Kitchens with children, multiple cooks, or a frequent walk-through need dedicated movement lanes.
Choose the route people naturally use to cross the kitchen. If it runs directly between triangle corners, the work loop is competing with circulation. That setup forces pauses, side-steps, and waits whenever someone passes.
Use these design fixes:
- Relocate staging. Move trash, dish tools, or small appliances closer to the correct triangle edge to reduce detours.
- Shift landings, not only appliances. Making a counter section usable can eliminate a lane crossing without moving plumbing or cabinets.
- Use a corner landing strategy. In L-shaped and U-shaped kitchens, place prep surfaces where people can reach them without standing in the center.
- Respect door swings. Dishwasher and pantry doors can create choke points even when the triangle measurements look good.
- Create a no-go lane. Keep one continuous route clear, usually along the main circulation wall.
In a narrow U-shaped kitchen, the triangle may fit while a doorway to the laundry room or pantry forces everyone between the sink and cooktop. Keep the triangle edge against the wall and run the walkway along the opposite side. You can then work the loop without stepping into the main route.
Account for a fridge door that opens toward the walkway. Its swing becomes a moving obstruction. Place the landing so you can grab and set down ingredients without leaving the triangle edge.
Identify one continuous walkway and protect it. Then treat the area around the triangle work zones as a place where people should not walk through mid-task. If the kitchen is too small for both, rely more heavily on zones and staging than on pure loop distance.
Workflow Triangle Options for Galley and U-Shaped Kitchens
Galley and U-shaped kitchens compress the triangle because circulation is limited. The solution is to treat the triangle as a set of staged edges rather than an open loop that people can walk around freely.
In a galley kitchen, one long corridor serves as the circulation spine. Run the triangle along that spine, with the fridge on one side, the sink in the middle segment, and the cooktop at the far end or along the same side. Avoid a crossing triangle that makes the narrow passage the main route between work points.
Efficient galley setups keep the stations aligned:
- Keep the sink edge close to food staging. Drainboards, drying racks, and counter space near the sink matter more than an unused decorative corner.
- Use a landing next to the cooktop. If the only landing is across the aisle, you will repeatedly carry food and cookware over the passage.
- Prevent door-swing collisions. Fridge and cabinet doors can block the route in a narrow galley.
U-shaped kitchens need the same discipline, plus careful corner planning. Deep corner cabinets create awkward reaches and extra steps when they hold frequently used tools. If you must leave the triangle to find equipment, storage is undermining the layout.
Use these U-shaped strategies:
- Put the sink on the most usable wall section. Avoid placing it in a corner where drawers or a dishwasher door block the landing.
- Use the open end for circulation. Keep that side clear so work stays inside the loop while people move along the outside route.
A U-shaped kitchen with the cooktop on one inside wall and a pantry door at the open end can work well when the open-end walkway stays clear and the cutting surface sits on the same wall as the prep landing. Placing prep supplies and trash in the center of the U creates a traffic island and makes the triangle harder to use.
When designing from scratch, choose the primary constraint first: narrow the circulation path slightly to protect the triangle edge, or keep the walkway wider and use more compact staging. Either choice trades movement space against counter usability, so make it deliberately.
Designing Clear Zones for Cooking, Cleaning, and Prep
Zones give each triangle edge a clear job. Prep is where food changes from raw to ready. Cleaning is where you rinse, wash, and reset. Cooking is where you heat and plate.
Connect each zone to the appropriate triangle edge. The fridge edge should lead to prep surfaces. The sink edge should connect to cleaning tools and dish reset. The cooktop edge should connect to plating space and serving tools. When those connections are unclear, you carry items across the kitchen or pile tasks in the middle.
Use these placement rules:
- Prep zone rule. Put cutting, mixing, and staging close to the fridge edge so ingredients move a short distance.
- Clean zone rule. Keep trash, rinse tools, and at least one drying or staging surface near the sink edge.
- Cook zone rule. Keep pots, oil, spices, and a hot landing counter next to the cooktop.
Plan for reset as well as active cooking. After prep, you need somewhere to clear cutting boards, rinse tools, and move cookware into washing mode. Make that reset area a small cluster near the sink and dish landing.
If the trash is across the kitchen and paper towels are near the fridge, the cleaning zone is not functioning as a zone. You will keep leaving the sink to gather supplies, breaking the loop even when the distances are within range.
A simple zone map looks like this:
- Cooking zone: The cooktop edge plus a hot landing counter.
- Cleaning zone: The sink edge plus a drying or reset surface.
- Prep zone: The fridge edge plus a cutting or mixing surface.
Overlapping zones create counter conflict. If the cutting area doubles as a dish-drying area, either food prep or dish drying will interrupt the other task. Zone boundaries do not need walls; they need clear usage expectations.
Keep the center of the kitchen as a corridor rather than a staging depot. When everything piles up in the middle, the triangle becomes a shuffle loop and loses the benefit of well-placed work points.
How To Validate Your Triangle With a Trial Workflow
Measurements cannot reveal every drawer conflict, door swing, or awkward reach. A realistic meal sequence will show where your hands and feet actually move.
Choose a normal evening meal and follow a sequence such as gathering ingredients from the fridge, rinsing produce at the sink, chopping and staging, cooking on the range, rinsing tools, and storing leftovers. Use a 30-minute trial and note every pause, backtrack, and turn.
Use this checklist:
- Start at the fridge. Can you gather ingredients and place them on the prep landing without crossing a walkway?
- Move to the sink. Can you rinse and reset tools without fighting door swings or blocked dish space?
- Cook at the range. Can you stage raw or hot items within easy reach without twisting around obstacles?
- Clean as you go. Can you wash, rinse, and set down tools near the sink without interrupting prep?
- Store leftovers. Can you return to the fridge edge without walking through the messiest part of the triangle?
If you carry a cutting board from prep to sink and then back to the cooktop, the problem is probably staging. You may not need to move the sink or range. Clearing or adding a landing surface can give the board a logical place to sit between steps.
Record every point that breaks the loop. Common failure points include:
- You cannot open the dishwasher while standing at the sink landing.
- The trash can is too far away for scraps during prep.
- The drying rack occupies the prep area.
- The cooktop landing is too small, so you set items on the wrong edge and carry them again.
Make small changes first. Clear counter surfaces and reassign storage for paper towels, spices, and tools. Then re-measure if necessary. Storage and staging often solve most workflow problems without moving plumbing.
At the end of the trial, count how many times you crossed the main circulation lane. More than once or twice during the 30 minutes indicates that the triangle is still fighting traffic. Revisit the walkway plan or zone boundaries.
Putting Your Kitchen Workflow Triangle Into Practice
An efficient kitchen workflow triangle matches the way you actually move, with short, repeatable transitions from refrigerator to sink to cooktop. Give priority to usable landing space and clearances.
Protect one continuous walkway, account for door swings, and keep staging supplies near the triangle edge where they are used. In galley and U-shaped kitchens, align the workstations so the narrow passage remains a circulation spine and corners do not become reach traps.
Set up distinct prep, cleaning, and cooking zones. Keep trash and dish reset supplies by the sink, prep surfaces by the fridge edge, and a hot landing counter by the cooktop. Test the arrangement with a real meal sequence, then adjust storage and staging before considering layout changes.
FAQ
How do I measure my kitchen workflow triangle correctly?
Measure from clear landing points rather than cabinet doors. Choose the usable counter edge next to the refrigerator, sink, and cooktop, then measure the likely travel distance between those landings. Include door swings and drawer pulls because they affect where you can stand during real tasks.
What if my triangle distances are outside the 4 to 9 feet total target?
A larger loop can still work when staging reduces detours. Add counter landing space near each corner, place trash and dish tools close to the sink edge, and keep frequently used items along the correct triangle path. If cross-traffic causes the most trouble, fix the walkway before changing the triangle.
Can a triangle layout be efficient with two people cooking?
Yes, if the layout separates their movement. Create a protected circulation lane so one person does not have to enter the other person’s work zone. Use distinct prep, cleaning, and cooking zones, and keep clutter out of the center of the triangle.
What’s the fastest way to improve workflow without remodeling?
Reassign staging and reset items first. Move trash and paper towels closer to the sink or prep edge, relocate spices and oils near the cooktop, and clear the counter so food does not pile up in the center. Then run a trial workflow to confirm that backtracking and lane crossings have decreased.
What’s the most common triangle design mistake?
Designing around appliance placement instead of usable landing space and clearance. Distances may look correct while a dishwasher door blocks the sink landing or a small cooktop landing forces awkward twisting. Fixing door clearance and counter landings often improves the workflow faster than moving appliances.
By Lisa Jayce, founder of NookTool. I test kitchen tools and share practical advice for real kitchens.