Why Do Kitchen Sponges Smell Bad
Kitchen sponges smell bad because they trap water, food particles, and grease, creating a warm, nutrient-rich environment for microbes. Odors get worse when a sponge stays damp, sits in a closed space, or is used to wipe up raw meat or dairy. A sour, rotten, or “dishcloth” smell usually means microbes and biofilm are embedded inside the sponge rather than sitting only on its surface.
Rinsing may remove loose debris, but it often does not remove the film inside the sponge’s pores. Warm temperatures and slow drying give odor-causing microbes more time to grow.
Key Takeaways
- Biofilm causes persistent odors. Sponges hold a wet film where microbes can build up.
- Moisture keeps the problem going. A damp sponge can start smelling worse within hours.
- Food residue feeds microbes. Meat and dairy residues add more organic material than plain water.
- Grease traps odor. Oil and soap scum slow drying and make cleaning less effective.
- Regular sanitation helps. Replace or disinfect sponges regularly, especially when they become discolored.
- Airflow matters. Store sponges where they can dry completely, not in a closed cabinet or wet holder.
Why Kitchen Sponges Develop a Sour or Funky Smell
Residue makes the problem worse. Sponges collect grease, tiny food particles, starch, and sometimes raw meat drips. Those materials give microbes nutrients and help odors return soon after cleaning.
A sponge is effectively a moisture trap. It picks up whatever you use it on, then holds water long enough for odor-causing growth to develop. That is why a sponge can smell fine one day and noticeably worse the next.
What Makes Sponge Odor Worse?
The basic pattern is simple: wet sponge, food residue, and time. Each use adds more residue, and each period of slow drying gives microbes more time to grow.
Common odor drivers include:
- Poor drying between uses. A sponge sitting in a puddle or compressed in a holder dries slowly.
- Embedded debris. Rinsing often removes surface gunk without clearing the biofilm inside the sponge.
- Contact with raw foods. Sponges used on meat or fish pick up a heavier organic load.
- Grease and soap scum. Oil can trap odors and make sanitizing less effective.
- Aging materials. As a sponge breaks down, it can become more absorbent and harder to clean fully.
- Warm conditions. A warm kitchen combined with a sponge that stays damp overnight encourages faster microbial activity.
How to Stop a Kitchen Sponge From Smelling
The most effective routine has two parts: remove residue and dry the sponge completely. If you do only one, the odor often returns.
Practical steps that work
- Rinse thoroughly, then squeeze. Rinse after use until the runoff is clear, then squeeze firmly to force out as much water as possible.
- Dry it on a breathable surface. Use a sponge rack with airflow, or hang the sponge so it is not pressed against the counter.
- Sanitize when the smell begins. Do not wait until the odor becomes severe. Interrupting the buildup early is easier than trying to reverse a stubborn biofilm.
- Use a separate sponge for raw meat. Keep one tool for meat and another for dishes. Even this simple separation reduces the residue load on your everyday sponge.
- Store it in the open. Do not put a damp sponge in a closed container, cabinet, or drawer.
Disinfection methods to consider
Choose a method that matches the sponge material and that you can repeat consistently.
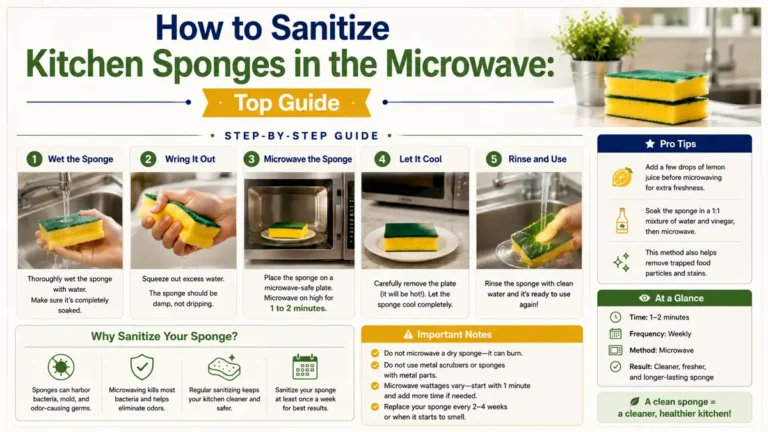
- Microwave sanitizing for microwave-safe sponges: Soak the sponge briefly in water, then follow the microwave-safe timing instructions for that sponge. Never microwave a sponge with metal parts.
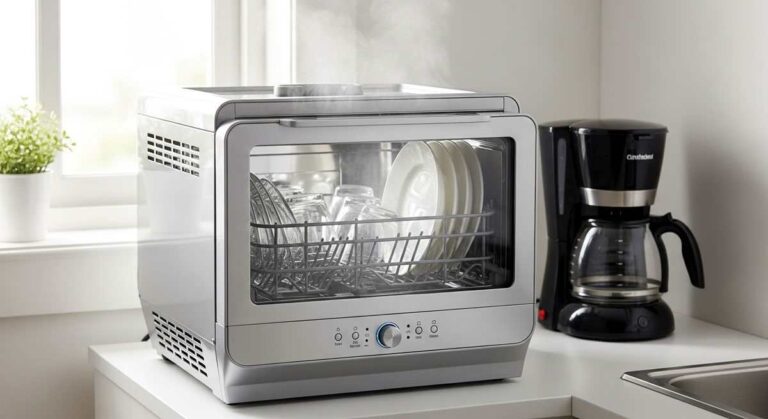
- Dishwasher cleaning: If the sponge is dishwasher-safe, run it through a hot cycle and let it dry completely afterward.
- Boiling water: If the material can tolerate it, briefly submerge the sponge in boiling water.
- Bleach solution: For sponge materials that tolerate bleach, use a diluted solution and rinse the sponge thoroughly afterward.
Check the label if you are unsure. Some materials degrade quickly or can hold chemical residue when they are not rinsed properly.
What Cleaner, Drier Sponge Habits Improve
A fresh-smelling sponge is more pleasant, and reducing buildup around the sink can limit what transfers back to dishes and surfaces.
Consistent drying and sanitation can also extend a sponge’s useful life. Sponges break down faster when they are continually loaded with food, kept damp, and left to deteriorate. You will still need to replace them periodically, but better care reduces waste and delays the point when the sponge becomes unusable.
The surrounding sink area matters too. Once you start squeezing out water and using an airflow rack, you are more likely to notice a slimy sponge holder, residue in the sink, or other sources that keep reintroducing odor.
Choosing a Sponge That Dries More Easily
The best option is the one that dries quickly in your kitchen and suits the way you clean. No sponge eliminates the moisture-and-residue problem by itself.
Sponge choices by use case
| Sponge / scrub option | Key spec (what to look for) | Best for |
|---|---|---|
| Standard cellulose sponge | High absorbency, needs fast drying | Quick dish work when you can dry it well |
| Antimicrobial sponge (claims vary) | Treated material, still needs drying | Busy households where you want extra help |
| Microfiber cloths | Cloth dries faster and can be laundered | Frequent wiping, dishes, and counters |
| Dish wand with washable head | Removable, replaceable head | People who want easy swaps and thorough cleaning |
| Disposable cleaning pads | Designed to be replaced | Heavy-residue jobs where you do not want to soak tools |
Antimicrobial treatment may slow odor, but it does not solve trapped moisture or food residue. A treated sponge can still smell if it stays wet for hours.
Improve the sink storage setup
Sometimes the sponge is not the only problem. A holder that collects water or keeps the sponge against a wet surface can prevent proper drying. A rack that exposes several sides of the sponge to air may make a bigger difference than switching brands.
Clean the sponge rack and nearby sink hardware as well. If the rack is slimy or holds standing water, it can transfer residue and odor back to a freshly cleaned sponge.
A Practical Sponge Replacement Routine
Treat a kitchen sponge as a short-life cleaning tool rather than a permanent fixture. If you wait until the odor becomes obvious, the sponge may already have a well-established buildup inside it.
For fewer odors:
- Aim for complete drying between uses. If the sponge is still damp hours later, it has more time to develop odor.
- Use a repeatable sanitation method. Choose a compatible method, follow its instructions, and rinse well.
- Separate raw-meat cleanup. Use a different tool for meat and fish to reduce the organic load on the main sponge.
- Replace worn sponges. A sponge that is old, textured, permanently stained, or quickly smelly after sanitation is usually better replaced than repeatedly deep-cleaned.
- Clean the storage area. A wet sponge rack or dirty sink can bring the smell back.
Some sponges develop stubborn biofilm that rinsing cannot remove. Sanitation may reduce the odor without restoring the sponge to like-new condition. When the smell returns within a day, replacement is usually the cleanest solution.
Common Kitchen Sponge Odor Scenarios
A sponge used on a pot of pasta sauce, briefly rinsed, and left in a puddle in the corner of the sink may smell by the next morning. Sauce residue supplies nutrients, while the puddle keeps the sponge wet – exactly the conditions that support odor-causing growth.
Microfiber cloths can work well for households willing to launder them regularly. They still collect residue, but prompt washing and complete drying give odor less time to build up.
Raw meat creates a different challenge. A sponge used on counters and cutting boards after handling chicken or fish can develop a persistent sour smell because it carries a heavier organic load. A dedicated sponge or disposable pad for that task reduces both the odor and the residue transferred to other surfaces.
If the sponge smells despite frequent rinsing and daily sanitation, inspect the holder. A rack with a standing-water tray can keep the sponge wet longer than expected, causing the odor to return no matter how often you clean the sponge.
FAQ
Why does my kitchen sponge smell bad even after I rinse it?
Biofilm can form inside the sponge’s pores, so rinsing removes surface residue without removing the microbes embedded deeper inside. If the sponge stays damp between uses, odor returns quickly. Complete drying and periodic sanitation offer a better solution than rinsing alone.
How often should I replace a kitchen sponge?
Replace a sponge when it smells soon after sanitation, looks degraded, or remains discolored. Many households need to replace sponges more often than expected, especially when they are used on greasy dishes or raw meat.
What is the fastest way to stop sponge odor today?
Squeeze the sponge firmly, rinse it thoroughly, and sanitize it using a method supported by the sponge’s label. Let it dry completely in moving air. Clean the holder too if it is wet, slimy, or prone to collecting water.
Do antimicrobial sponges prevent smells completely?
No. Antimicrobial treatment may slow odor, but it does not remove the underlying combination of moisture and trapped food residue. A sponge that remains wet for hours can still develop an odor.
Is it safe to use bleach to deodorize sponges?
Bleach can help when the sponge material is compatible with it, but use a diluted solution and rinse thoroughly afterward. Some sponge materials degrade or retain residue if they are not rinsed well. Check the label and rinse until the bleach odor and residue are gone.
A smelly kitchen sponge is usually a drying and residue problem, not a mystery chemical issue. Squeeze out the water, switch to a rack with airflow, sanitize the sponge with a compatible method, and replace it if the smell returns within a day.