How To Insulate Under Kitchen Sink In 7 Easy Steps
Cold water supply lines under a kitchen sink can freeze quickly when the cabinet is poorly vented or the pipes run along an exterior wall. The fix is straightforward: insulate exposed pipe sections, block drafts into the cabinet, and keep water moving during severe cold. With the right materials, most homeowners can complete the work in an afternoon.
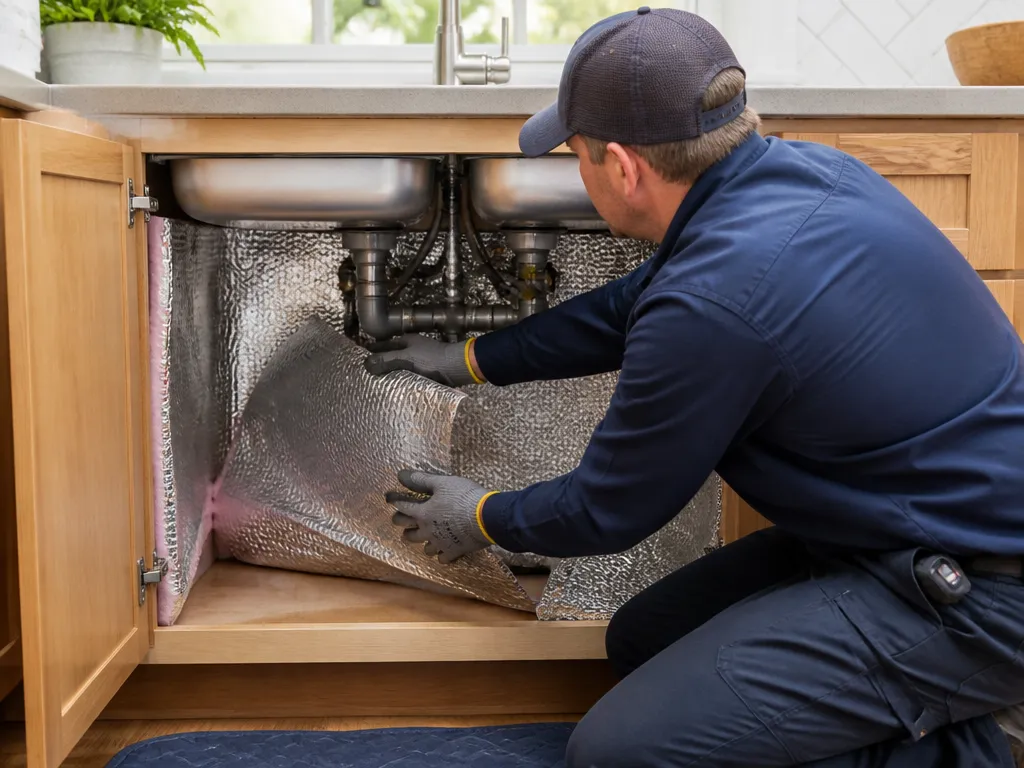
Foam pipe sleeves should fit the pipe’s outside diameter. Seal every seam with foil tape or HVAC foil tape, then caulk gaps around plumbing penetrations and add draft blocking behind kick plates or cabinet panels where needed. Pipes near an exterior wall may also need a thicker layer of cabinet insulation around the back and sides.
Key Takeaways
- Match the sleeve to the pipe. Measure the pipe’s outside diameter and buy matching foam pipe insulation.
- Seal every seam. Use foil tape to close joints and cuts so the insulation stays tight.
- Cover the vulnerable sections. Focus on exposed supply lines, shutoff valves, and pipe runs near exterior walls.
- Inspect after installation. During the next cold snap, confirm the insulation is dry, snug, and covering the coldest sections.
How To Insulate Under a Kitchen Sink
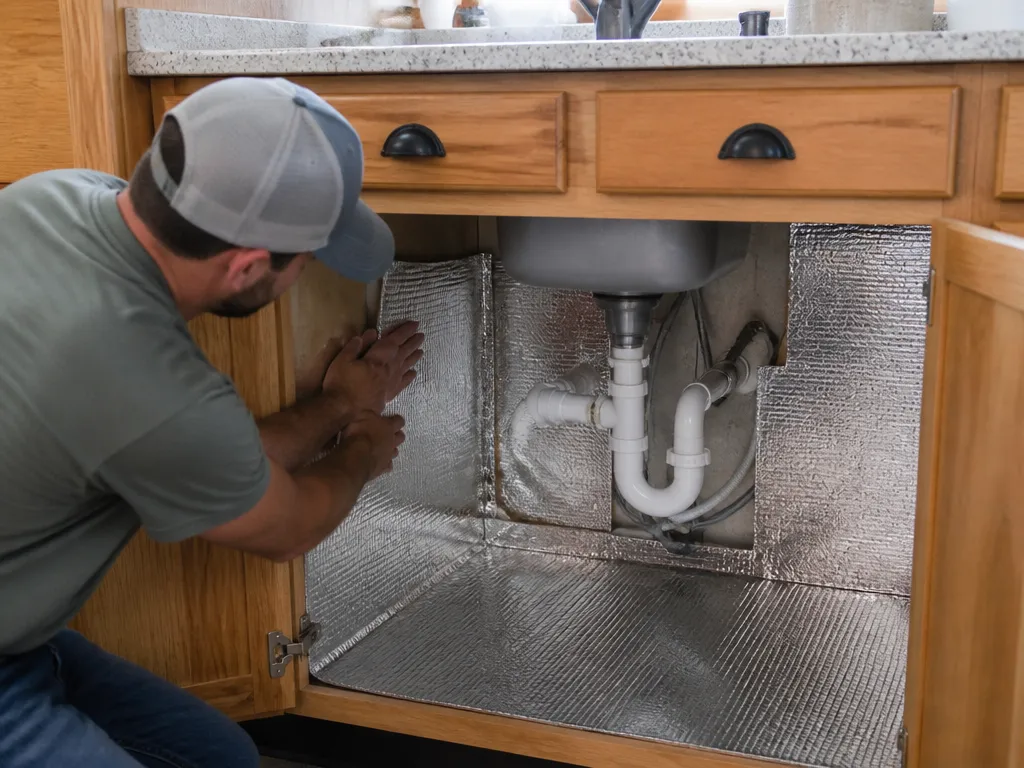
Under-sink insulation should slow heat loss around the supply and drain plumbing enough to reduce the chance of freezing during short cold snaps.
Pipes freeze when the water inside falls below 32°F and stays there long enough to form ice. Under a sink, the cabinet may be uninsulated, leaky around plumbing penetrations, or exposed to air movement from HVAC registers, dryer vents near the wall, or gaps at the back. Insulating without addressing those drafts can leave cold air flowing directly over the pipe.
You can usually complete this project as a DIY job in an afternoon. Pause and get help if you find active leaks, wet insulation, soft drywall, or signs of a previous frozen burst. Insulation will not repair a cracked pipe or stop water that is already seeping.
What Causes Pipes To Freeze Under Sinks
Cold air leaking into the cabinet is the most common cause. It washes over the pipe and cools it faster than the warm room air can replace that heat. Even with a normal thermostat setting, the cabinet can act like an uninsulated box connected to an exterior wall or an unheated crawlspace.
A supply line may run along the back of the cabinet near an exterior wall, or connect to a shutoff valve sitting in a cold pocket. A draft can then enter through a gap behind the kick plate, around a wall penetration, or through a loose back panel. As the pipe surface cools, the water inside cools with it.
Poor insulation in the wall behind the sink cabinet creates another cold spot. If the exterior wall cavity is poorly insulated, the cabinet can remain cold even when the rest of the room feels comfortable. Without that thermal buffer, pipe insulation has less protection from the cold wall.
Freezing risk also increases during extended periods below freezing, especially when HVAC heat is intermittent. Small drafts can freeze a stationary water line after hours of heat loss.
Which Insulation Works Best for Supply Lines
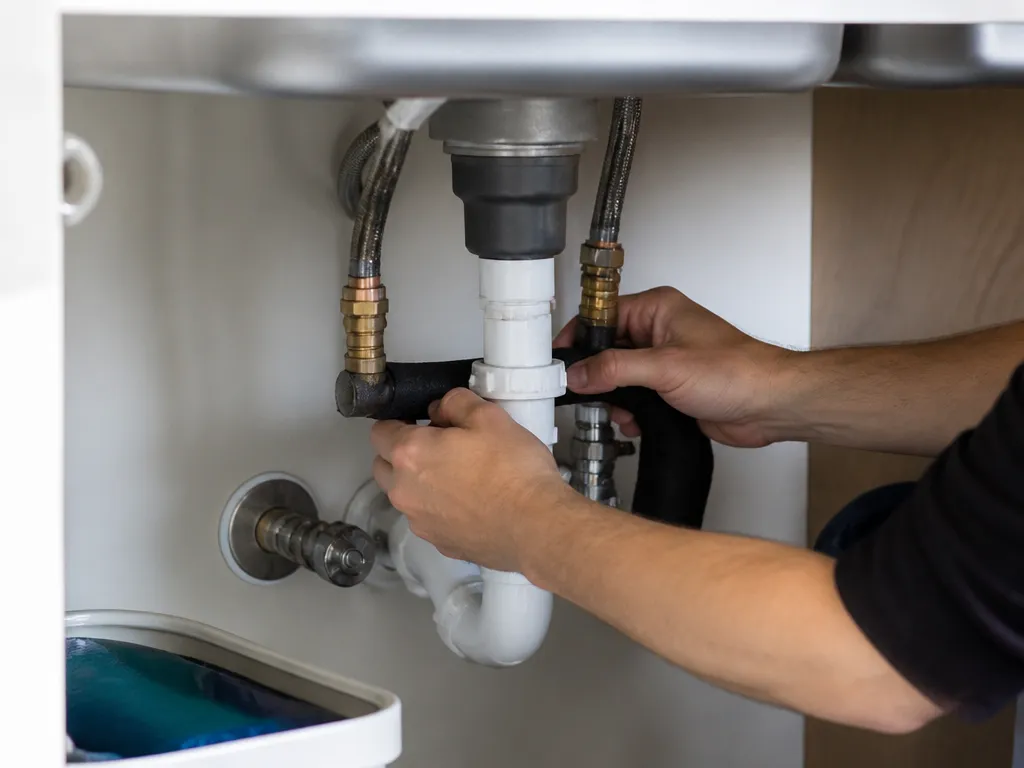
Foam pipe insulation is the best starting point for most kitchen sink supply lines. It is easy to cut, made for pipe applications, and forms an insulating layer around the line. Choose closed-cell foam sleeves that match the pipe’s outside diameter. Closed-cell foam resists water absorption if a small amount of moisture collects inside the cabinet.
For typical copper or PEX supply lines, choose foam sleeves rated for temperatures compatible with freezing conditions and available in the correct diameter. Valves and fittings require more careful fitting. Cut the sleeve into smaller sections or shape it around the irregular parts instead of forcing one piece over the entire assembly.
Avoid wrapping pipes with random fiberglass or cloth insulation. These materials can hold moisture, become messy, and leave gaps around the pipe. Any gap that allows cold air to contact the metal or pipe surface reduces the benefit of the insulation.
Step-by-Step Pipe Insulation Installation
Gather the materials before you begin:
- Foam pipe insulation sleeves sized to the pipes
- Foil tape or HVAC foil tape
- A utility knife or scissors
- A tape measure
- Caulk, weatherstripping, or foam backer rod for draft sealing
- Inspect and dry the cabinet. Check for leaks and make sure the cabinet is dry. If you see drips, repair the leak first or turn off the water before beginning the repair.
- Measure the pipe outside diameter. Measure the outside diameter of each supply line. Buy sleeves that match the outside diameter, not the inside diameter.
- Cut the insulation to length. Cover the exposed sections most likely to become chilled, including pipe near the cabinet back, an exterior wall, or a shutoff valve.
- Fit the insulation around bends and valves. Use pre-slit foam or cut the sleeve carefully to open it where needed. For valves and fittings, use several smaller pieces rather than forcing one sleeve that leaves gaps.
- Tape every seam. Seal the lengthwise seam and every joint with foil tape. Pay particular attention to elbows, valve connections, and places where two pieces meet.
- Keep the foam from crushing. Foam must retain its thickness to insulate effectively. Do not cram it into a space so tightly that it collapses.
- Preserve access and drainage. Keep valve handles reachable and avoid blocking moving parts. Drain lines and P-traps can also freeze, but they require a different approach. Focus insulation on areas exposed to unusually cold conditions.
Dry-fit the pieces before taping them. Hold the insulation in place, check that it covers the coldest-looking sections, and then secure it once the fit is correct. If the foam rattles or slides, add another strip of tape or adjust the cut.
If a shutoff valve sits in a cold pocket at the back corner of the cabinet, insulate the valve body and the adjacent pipe for several inches on both sides. Sealing those junctions prevents cold air from slipping between the foam and pipe.
After installation, the pipe area should feel less exposed to the cold. It may still feel chilled during a long freeze, but the cabinet should no longer leave the pipe surface feeling like an uncovered metal tube.
Seal Cabinet Gaps and Block Drafts
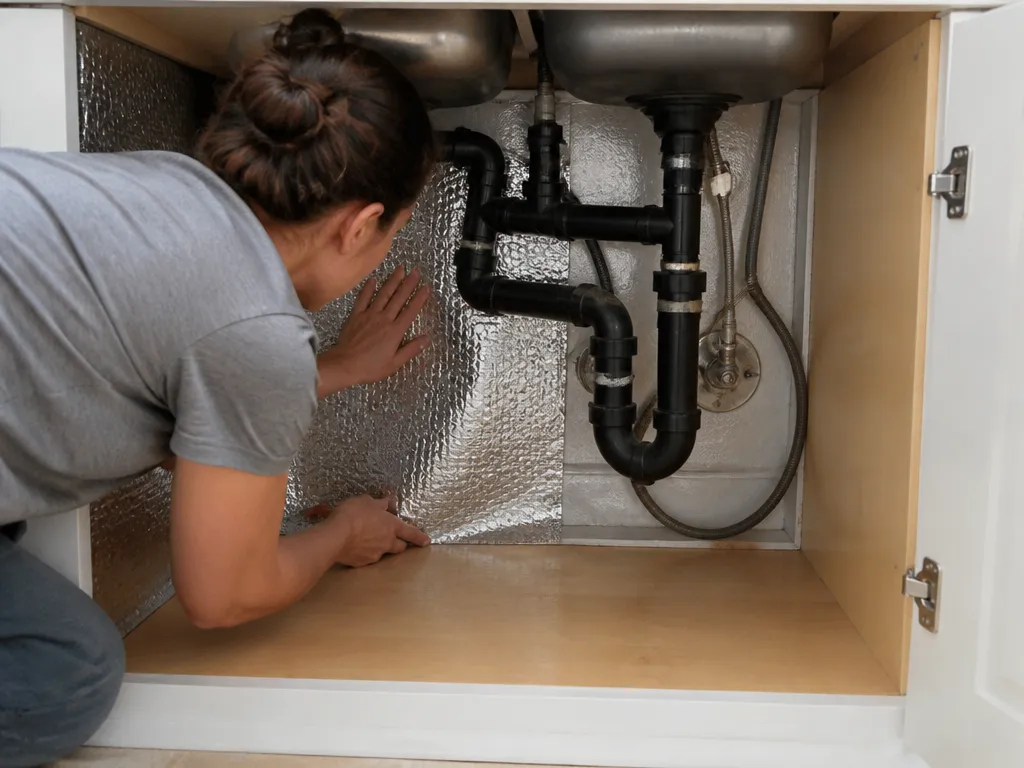
Check the common entry points first:
- Gaps around the wall penetration where supply lines enter
- Openings around the cabinet’s back panel
- Cracks around electrical cords
- Gaps around small plumbing branches
- Openings behind removable kick plates
During cold weather, hold a thin strip of tissue near suspected gaps and watch for movement. Airflow will make the strip flutter.
Seal gaps around pipes with caulk or another appropriate sealant. For a large opening, press foam backer rod into the gap before applying caulk. That usually creates a more durable seal than filling the entire opening with caulk alone.
Add draft blocking behind the cabinet where cold air is likely to enter. If the sink cabinet has a removable kick plate or back panel, install simple blocking behind those openings. Reduce airflow across the cabinet without sealing it so tightly that you trap moisture. If the cabinet already has condensation or leaks, solve that moisture problem first.
Do not block dryer vents, range hood ducting, or plumbing vent pathways. Draft blocking should target the cabinet area around the pipes, not building ventilation or safety systems.
Use this checklist before closing the cabinet:
- Caulk pipe penetrations where cold air enters.
- Seal cabinet panel gaps that allow outside air to blow in.
- Add draft blocking behind kick plates or removable backs when appropriate.
- Confirm access to every shutoff valve.
Add Heat Protection for Severe Freezes
Insulation and draft sealing may not be enough during extreme cold, in a very leaky cabinet, or when plumbing runs through an unheated space. A controlled heat source can provide backup in those conditions.
The usual option is a UL-listed heat tape or pipe heating cable made specifically for plumbing freeze protection. Do not use improvised electrical wiring or a generic heat source. Follow the product instructions for placement and spacing, and plug the system into a GFCI outlet when required.
Install the heat tape only on the freeze-prone sections you already identified, such as exterior-wall runs, pipe near the cabinet back, and areas exposed to cold drafts. Do not cover the heating element in a way that conflicts with the product instructions. Some systems can be covered with insulation, while others have different requirements.
A small, continuous stream of water can serve as another short-term backup during the coldest period. Moving water is less likely to freeze than stagnant water. This approach can help when you are away from home or facing multi-day freeze conditions, but it uses water and is less economical for extended periods.
If you see frost on a pipe or hear banging associated with expansion, do not assume the pipe will thaw safely on its own. Use a controlled, low-risk heat source and never apply an open flame or direct high heat near supply lines.
Check the Installation During Cold Weather
Inspect the finished work to make sure the insulation has not shifted and still covers the pipe sections you targeted.
Push gently on each sleeve. It should stay snug rather than slide along the pipe. Look for uncovered seams, gaps at joints, and sections crushed by tight clearance. Confirm that valve handles remain reachable.
Check for moisture as well. Wet foam, discoloration, or dampness around the cabinet may indicate an active leak or condensation problem. Wet insulation loses effectiveness, and continued moisture can contribute to corrosion on metal pipes.
Inspect the cabinet again during the next cold snap. A quick touch check from outside the cabinet can reveal problem areas. If one section feels much colder than the rest, cold air may still be entering there, or the pipe run may not be covered well enough.
Keep a simple record of changes that work. If you caulk the cabinet’s back corner and tape the foam seams, note whether that section still develops frost. Tracking the results helps you target the next repair instead of repeating the same steps each winter.
If you installed heat tape, verify that it is operating safely according to the product instructions and that the GFCI outlet functions correctly. Never leave a heating element running without confirming that it was installed properly. Turn it off if you smell burning or see damaged insulation, then address the electrical problem.
If frost still appears around the shutoff valve two nights after installation, add insulation around the valve body and adjacent fittings. Irregular shapes create hidden gaps, and cabinet corners often collect the coldest air.
FAQ
Can I Insulate Under My Kitchen Sink Without Removing the Pipes?
Yes. Foam sleeves are designed to wrap around existing pipe runs, so most supply lines can be insulated in place. Measure the pipe’s outside diameter, cut the insulation to length, and tape the seams tightly. Repair any leak or broken section first because insulation can trap moisture around damaged plumbing.
What Is the Cheapest Way To Insulate Pipes Under a Sink?
Use foam pipe insulation sleeves, foil tape for the seams, and caulk for the main cabinet draft gaps. Skip specialty wraps unless the pipe shape or cabinet layout requires them. If cold air is blowing into the cabinet, sealing the drafts often improves freeze protection more per dollar than adding thicker pipe insulation.
Will Insulating Under the Sink Stop Pipes From Freezing in Extreme Cold?
It can reduce the risk, but it may not prevent freezing in every situation. Insulation slows heat loss, and draft sealing reduces the amount of cold air reaching the pipe. A long freeze or heavy airflow can still overwhelm both measures. If the pipes have frozen before, keep a correctly installed, freeze-rated heating cable or a short period of water trickling in reserve for the coldest hours.
How Can I Tell Whether My Pipes Are Freezing or Just Cold?
Visible frost, unusual ice buildup at fittings, or reduced water flow from the faucet can indicate freezing. A cold pipe without frost is usually simply cool to the touch. If you suspect ice inside the line, inspect the cabinet carefully and do not force water through the pipe if you see obvious ice around a shutoff or fitting.
Is There a Better Alternative to Pipe Insulation?
Sometimes the better solution is to address the main heat-loss path by sealing cabinet penetrations and adding draft blocking. Cold air can cool a pipe faster than insulation alone can protect it. If your home has frequent freeze events or long pipe runs through unheated spaces, a UL-listed heat tape system installed according to its instructions may provide more reliable protection than adding more foam each year.