How To Organize Kitchen Waste And Recycling
Sorting food scraps, recycling, and trash gets easier when every stream has a clear home. In the US, use one consistent station layout, simple labels, and a planned emptying routine. A practical setup can fit most kitchens and helps prevent odors, leaks, overflowing bins, and recycling contamination.
Organize bins around three streams: trash, recycling, and compost or food scraps. Place them where you use them, label them clearly, and choose sealed containers with liners for wet waste. Then empty and restock everything on the same planned day each week, adjusting when odor or volume requires it.
Key Takeaways
- Start with 3 streams. Separate trash, recycling, and food scraps (compost if available) so contamination stays low.
- Place bins by zone. Put containers near the sink, stove, prep area, and entry points to reduce “momentum dumps” in the wrong bin.
- Label before sorting. Use large text and simple pictures, then repeat the same labels on lids and liners.
- Use leak-proof containers. Choose bins with tight lids and liners for wet scraps, then clean them on schedule to prevent buildup.
- Empty on a schedule. Use a fixed day to prevent overflow and smells, and empty more often when weather or volume makes it necessary.
- Update labels when rules change. If your city changes what it accepts, revise your labels the same week to avoid guesswork.
How To Organize Kitchen Waste and Recycling Bins
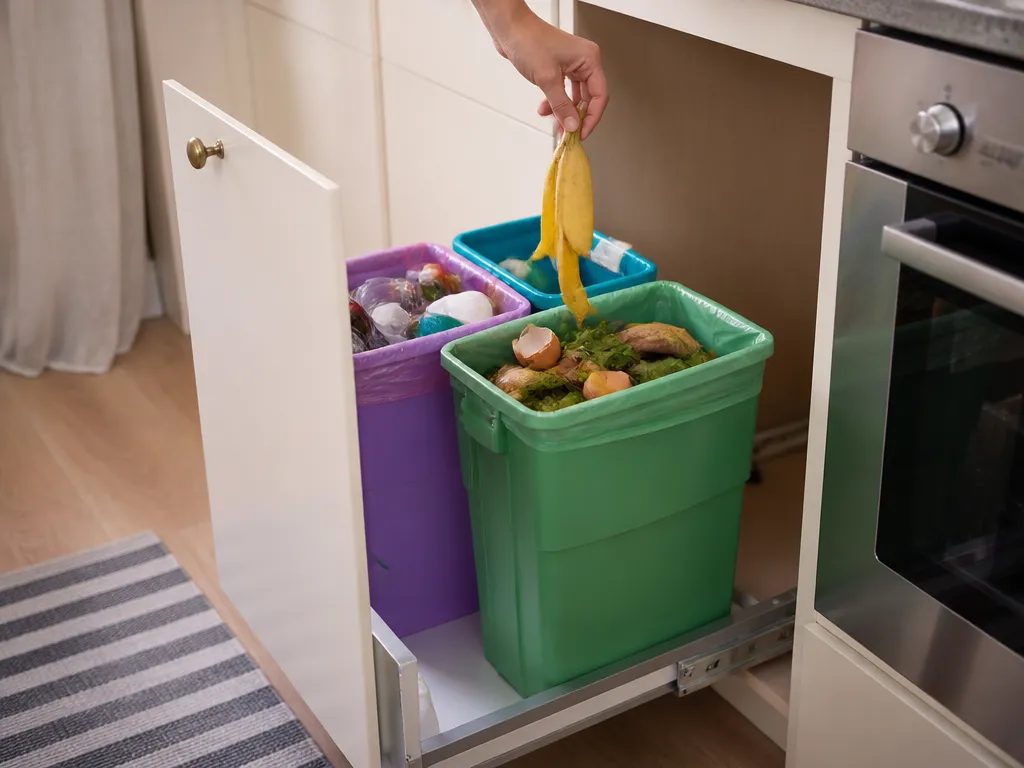
Treat waste sorting like a workflow, not a personality test. The goal is fewer decisions during cooking and cleanup, so build stations around your daily habits. For most kitchens in the US, that means three streams: trash, recycling, and food scraps – compost if you have it, or a food-scrap bin if you use municipal organics.
You need three things before you start: (1) your local recycling categories, (2) a location for each stream, and (3) containers and liners that match what you throw away. If your recycling program is strict, smaller containers may work better because you can empty them quickly. If you have curbside organics, add one dedicated food-scrap pail.
A setup that works in most US kitchens
Use a “two-touch rule”: food scraps and packaging should need no more than two transfers to reach the correct stream. You should be able to toss peels into a countertop caddy, then dump them into the under-sink bin in one quick step. Keep recycling dry and rinse it enough to prevent residue odors, or contain it so it does not stink up the kitchen.
Choose bin sizes based on how often you use each stream, not on what looks neat. Wet scraps are added daily and develop odors quickly, so they need an easy-access container and liners. Recycling accumulates more slowly and can stay in a closed bin longer, but it should remain dry to prevent residue and smells.
Which Items Go in Trash, Recycling, or Compost?
Most sorting confusion comes from trying to memorize rules instead of checking your local accepted-items list. Keep one reference card in the kitchen – in a drawer or inside the recycling lid area – and follow it exactly.
This practical split usually holds in the US, with two cautions: your city may have special rules, and recycling generally needs to be clean and dry.
- Go in trash (typical): food-soiled paper towels and napkins, greasy pizza boxes (unless your program says otherwise), plastic wrap, broken ceramics, diapers, and contaminated or moldy items.
- Go in recycling (typical if accepted and clean): aluminum cans, steel/tin cans, many glass bottles and jars, paper and cardboard (usually flattened), and certain plastics (number-specific or “accepted plastics list”).
- Go in compost or a food-scrap bin (typical): fruit and vegetable scraps, coffee grounds and filters, tea leaves, eggshells, and most food leftovers that are not meat-heavy if your local program restricts meat.
Contamination causes the biggest problems. An item that belongs in trash can spoil an entire recycling load. An item that belongs in recycling may still end up in the trash if it is wet, greasy, or dirty.
Use a “When in Doubt” Rule
Put a rule on a sticky note that everyone can follow: “If it’s not on the accepted list, it goes in trash.” Another useful rule is, “If it’s greasy or wet enough to soak, it goes in trash.” These shortcuts reduce mental effort and keep the system consistent.
Set Up Kitchen Sorting Stations by Zone
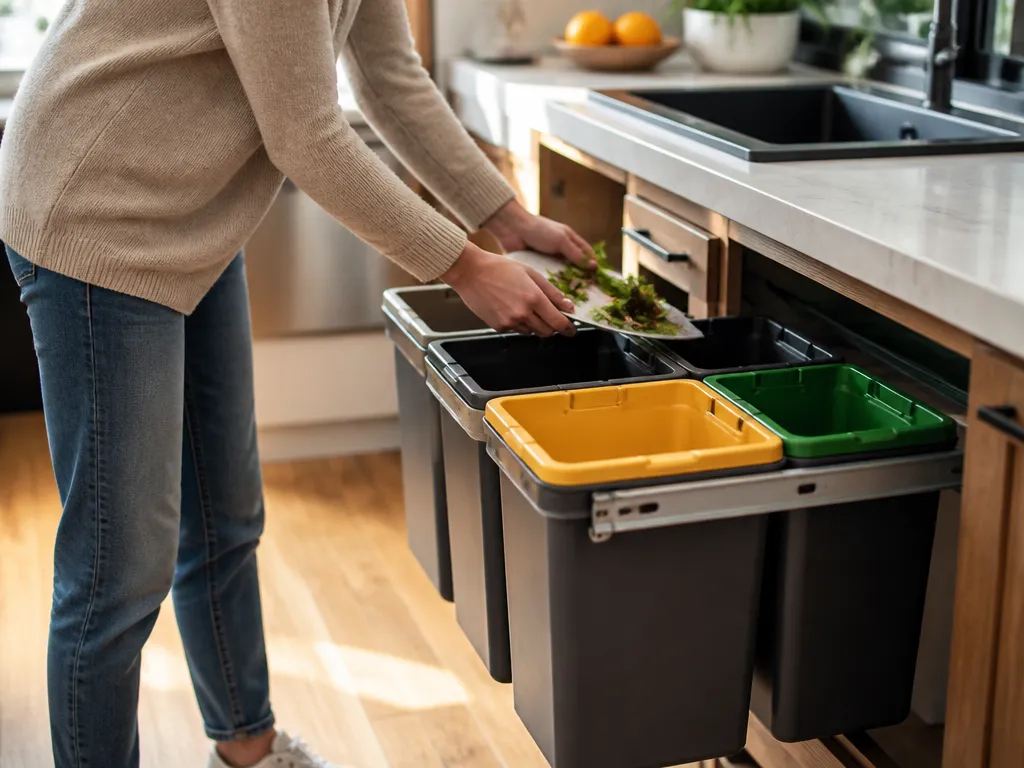
Zone-based sorting works better than one central bin when the stations match your movements. If trash and recycling sit far from where you cook or eat, people carry items past the correct option and leave the mess for later. Put each container where the related waste is created.
Most kitchens have three useful zones: cooking near the stove and sink, prep at the counter, and disposal near the exit or the place where bins go outside. Set up two small containers near prep and cleanup, then keep larger bins in the main disposal location.
A Simple Zone Plan
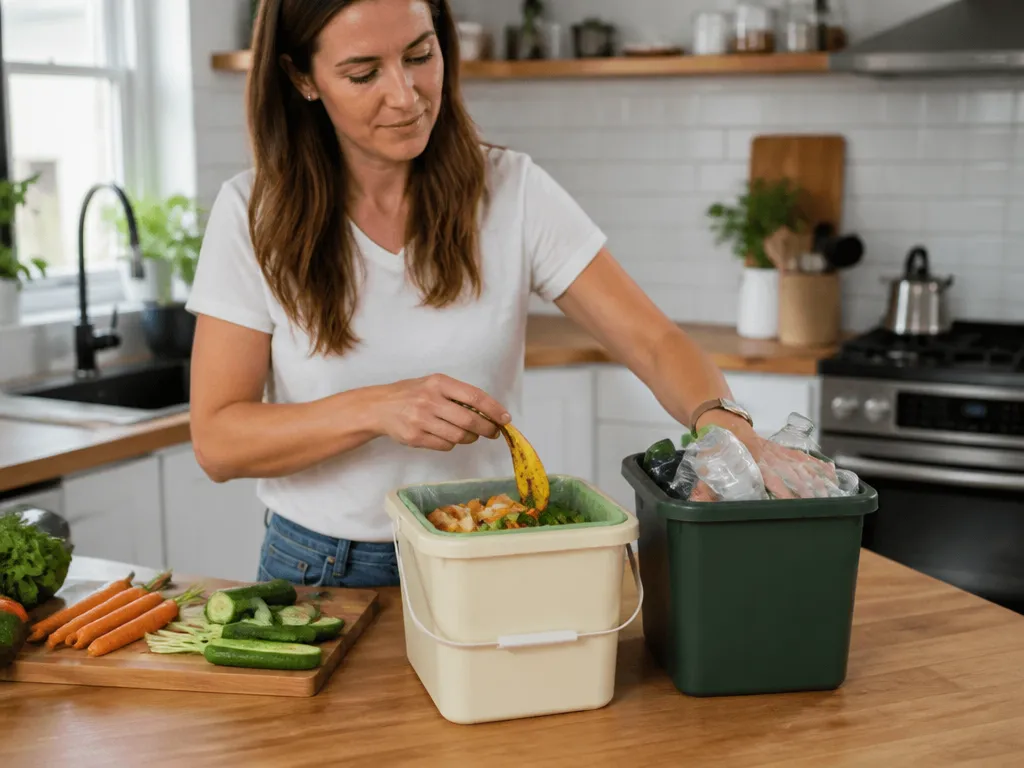
Place a small counter caddy for food scraps near the prep area and sink. Put a separate recycling container where you handle packaging, often near the sink for rinsing or near the counter for flattening. Keep trash closest to the place where you already throw things away, often under the sink or beside the main cleanup area.
Then consolidate the household’s larger bins in one spot:
- Counter: small food-scrap container with liners
- Under-sink or near back door: larger covered bins for scraps, recycling, and trash
- Optional: a tight recycling bin by the exit if you toss items right before taking out trash
When you chop vegetables, drop peels into the counter scraps caddy. When you wash dishes, rinse and empty recyclable containers into the recycling bin. When you scrape leftovers, handle scraps first, trash second, and recycling last. That order helps keep recycling cleaner because you deal with wet waste before dry packaging.
Build Around Your Household’s Habits
If several people use the kitchen, assume that one person’s mistake can affect the whole system. Use fewer, clearer stations instead of many ambiguous ones. If you have kids, place labels at child eye-level and make the food-scraps station obvious and easy to open.
With limited cabinet space, prioritize a countertop setup and a simple routine: empty the small container into the larger bin. Odor control gets easier when the counter container is small and dumped often.
Label and Color-Code Bins for Fast Cleanup
Labels prevent contamination by making the correct choice obvious. Use the same wording everywhere so no one has to translate between the counter caddy, larger bins, lids, and liners.
Color coding helps when more than one person uses the kitchen, but only if the colors stay consistent. Choose a simple system and keep it long-term.
A Labeling System That Works
Put three elements on every container: the stream name, a short list of accepted or example items, and a clear “no” reminder for common mistakes.
Example label wording:
- Food scraps / Compost: “Veg + fruit scraps, coffee grounds” and “No plastic, no grease”
- Recycling: “Cans, bottles, cartons (accepted list)” and “Keep dry, rinse quick”
- Trash: “Everything else” and “No recyclables”
Match the colors to the labels. Many households use:
- Green for food scraps or compost
- Blue for recycling
- Black or gray for trash
The exact colors matter less than consistency. If trash is blue one week and gray the next, the color system stops helping.
Put Labels Where People Toss Waste
People clean bins by closing them the way they open them. Put the label on the front of the lid or the top rim so it is visible during use. Add a matching label to the inside liner box or underside of the lid so you always know which supplies belong with each container.
If you use liners, label the liner bag too. It may seem fussy, but it prevents the common mistake of grabbing the wrong liner in a hurry.
Reduce Odors and Leaks with the Right Containers
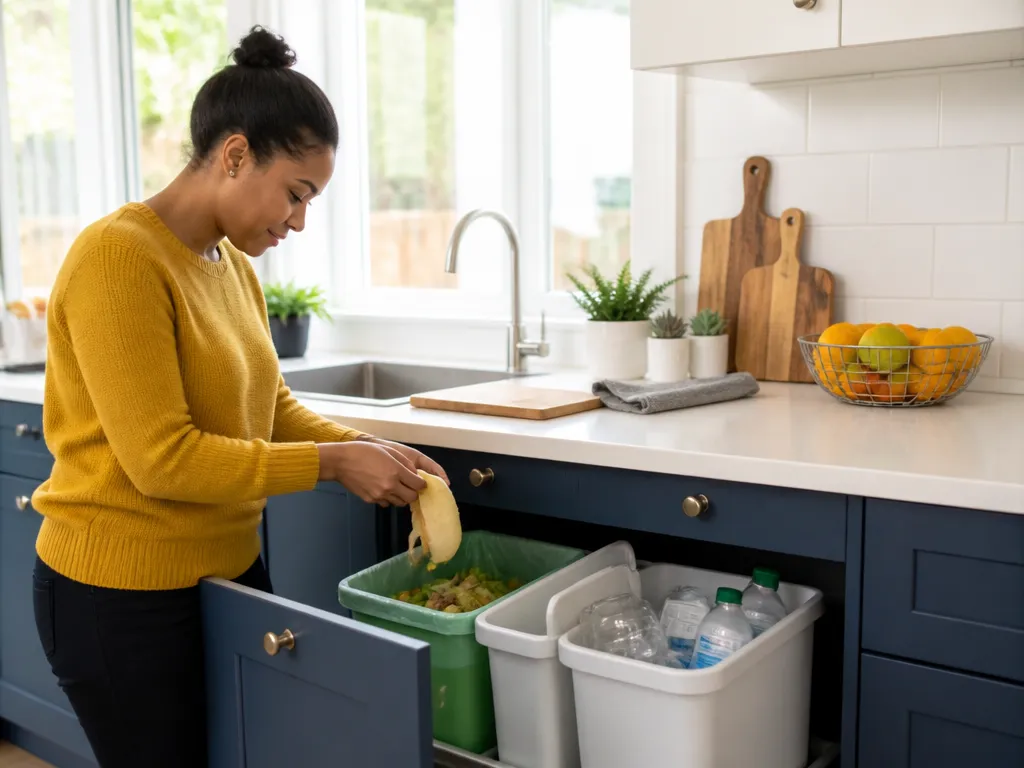
Odors and leaks can derail a sorting system because the kitchen stops feeling clean. The fix is the right container, a suitable liner, and a regular cleaning schedule. Wet food scraps cause most problems, especially in porous containers or bins with loose lids.
Choose containers based on what they hold:
- Food scraps: tight lid, easy-to-wipe surface, and liners that trap moisture
- Recycling: dry-friendly container with a lid that reduces spills
- Trash: sturdy container that can handle occasional wet waste
A counter scraps container should be easy to carry to the sink and dump without dripping. Under-sink bins should have lids that help keep fruit flies and smells from spreading through the cabinet.
Practical Odor Control
Use liners for wet waste. Even if you compost, liners make disposal cleaner and reduce residue on the bin walls. Tie off liners and take them out according to your schedule.
Smaller bins fill faster, but they also get emptied more often, which reduces buildup. If a large under-sink scraps bin stays half-full for two weeks, it can smell long before it reaches capacity.
If you notice an odor after a few days, change the container routine before reaching for an air freshener. Switch to a smaller countertop scraps bin and transfer the contents more often. That addresses the buildup instead of masking it.
Fixing Leaks
If a bin leaks, check three things in order: lid seal, liner fit, and liquid pooling at the bottom. A liner that rides up during dumping can leave the corners exposed. Use a liner that fits snugly and a container with smooth interior walls.
Do not overstuff the bin. Wet scraps pressed against the lid seal can force residue through gaps. Stop filling when the lid still closes cleanly.
Create a Weekly Workflow for Emptying and Restocking
A weekly workflow works better than sorting or cleaning whenever you remember. The goal is to keep each bin below its odor and mess threshold so nothing overflows during the week.
Choose a day that matches trash pickup or your household cleaning day. For many people in the US, that is the same day they take out regular garbage. Follow the same sequence every week: empty, wipe, replace liners, and restock supplies.
A 10- to 20-Minute Workflow
Do these steps on the same day each week:
- Empty food scraps first. Carry the counter container out, then dump it into the larger bin or compost setup.
- Empty recycling next. Move recyclables into the curb bin or storage container that matches your pickup rules.
- Empty trash last. This avoids splashing or cross-contaminating recycling surfaces.
- Wipe down the bins. Focus on areas that touch residue, then let the bins dry fully.
- Restock liners and bags. Put new liners in the bins before you finish so the next use is easy.
- Check the labels. Replace anything peeling or difficult to read while the bins are open.
If your compost program requires bag-free food scraps, you can still use liners temporarily in the counter caddy, then remove them when you empty it. The weekly wipe prevents residue buildup from causing the next week’s smell.
Store Supplies Near the Bins
Keep spare liners and recycling bags in a cabinet near the containers, not in a distant closet. If restocking requires a separate trip, someone will delay it and the bins will overflow.
Adjust the schedule during seasonal odor problems. Hotter weather usually requires more frequent transfers, especially for food scraps.
Keep Up with Changing Recycling Rules
Recycling rules change as contamination problems and market conditions change. Stop guessing when your local program updates its guidance, then revise the labels and routine immediately.
Separate what you assume belongs in recycling from what your program currently accepts. Your kitchen labels should reflect the current accepted-items list. When the city changes its rules, update the “yes” and “no” text without redesigning the entire station.
Update Labels Without Disrupting the System
When your local program posts new guidance, take these steps the same week:
- Update the recycling label examples to match the accepted list.
- Update your “when in doubt” rule if the program provides clearer categories.
- Remove confusing items from your routine. If new rules drop a plastic type, stop rinsing and sorting it right away.
- Add a temporary note on the bin lid for one week: “New rules effective (date).”
If your city stops accepting a specific plastic number, keep the same blue container but change the label from “accepted plastics” to “accepted plastics list only.” The zone layout stays stable while the sorting decision changes.
Create a Fallback for Uncertain Items
No label can cover every edge case, including stained paper, coated cardboard, and mixed materials. Use a firm fallback when you cannot verify an item. That prevents “wish-cycling,” or putting something in recycling simply because you hope it belongs there.
FAQ
How do I set up kitchen waste and recycling bins in a small kitchen?
Use one countertop spot for food scraps and one under-sink or near-exit spot for the larger bins. Keep recycling separate from wet waste, and use tight lids for scraps. Label each lid and liner so anyone can sort an item in one motion.
What should I do with pizza boxes, and where do they go?
Put pizza boxes in trash when grease has soaked through or left residue that cannot be rinsed clean. If your local program explicitly allows certain pizza boxes, follow that guidance.
How often should I empty food scraps to prevent smells?
A weekly emptying plan works for many households, but hot weather and high scrap volume often require more frequent transfers from the counter to the larger bin. If odor appears after 2 to 3 days, shorten the time between dumps.
What’s the fastest way to label bins for recycling rules I can’t remember?
Use large text and a short list of accepted examples taken directly from your local rules. Add one “no” line for common mistakes, such as “no greasy paper” or “keep dry.” Put the label on the front of the lid so it is visible during tossing.
What’s the most common mistake people make when organizing recycling?
The most common mistake is adding items that are wet, greasy, or not accepted. Keep recycling dry, rinse items when needed, and check the accepted-items list when you are unsure.