How To Arrange Kitchen Tools By Cooking Frequency
The best kitchen arrangement puts tools you use 3+ times per week in the nearest drawer, counter-height zone, or utensil crock. Weekly tools belong in task-based clusters one step farther away, while seasonal and occasional items can go in upper cabinets, deep shelves, or labeled bins. Rank every storage choice by grab speed, return ease, search reduction, damage prevention, and the effort it takes to keep organized.
If you cook most nights, the “daily” drawer should let your hand reach the right tool in under 5 seconds. Grouping tools by cooking frequency cuts the back-and-forth that turns chopping, sautéing, and cleanup into a chore. Aim for “one tool family per drawer face” so you can move from prep to plating without stopping to search.
Key Takeaways
- Start with your habits. Track what you touch during 3 typical meals, then label tools by frequency tier.
- Build three physical zones. Daily tools go at counter height or in the nearest drawer, weekly tools go next, and seasonal tools go out of the way.
- Group by task type. Keep “chop and prep” tools together and “bake and roast” tools in one weekly cluster.
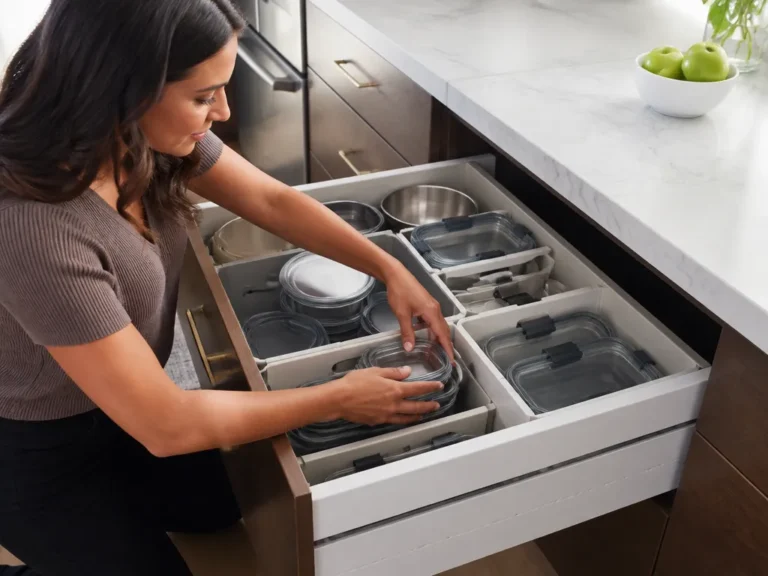
- Match storage to shape. Use dividers for flat tools, vertical holders for cutting boards, and hooks for long handles.
- Use one rotation rule. Move seasonal items based on your first actual use, not the month on the calendar.
- Verify with timing. Run a 10-minute prep test and compare tool travel before and after the reorganization.
How To Arrange Kitchen Tools By Cooking Frequency
Put the tools you reach for most often closest to the work area, even when they are not the most attractive items in the kitchen. A good arrangement minimizes both travel distance and decision time. The best-looking storage system is a poor choice if it makes you open three drawers to find a spatula.
List your tools and assign each one a frequency tier based on real use. If you do not want to estimate, tally every tool you use during several cook sessions. After 3 to 5 meals, most items will fit into one of three groups:
- Daily-grab: Used on most cooking days.
- Weekly-task: Used for planned meals or recurring weekly tasks.
- Seasonal/occasional: Used only a few times per season or year.
Daily-grab tools should sit where your hands naturally move while you stand at the stove or prep counter. Weekly tools belong in the next-closest zone, such as the drawer beside the main prep area or a cabinet one level down. Seasonal and occasional tools can go higher, deeper, or behind bins so they do not crowd the daily flow.
Rank storage options using five practical criteria:
- Grab speed – How quickly you can reach the tool mid-cook.
- Return ease – Whether you can put it back without hunting or reorganizing.
- Confusion rate – How often you use the wrong tool because the right one is hard to find.
- Damage prevention – Whether the storage reduces chips, warping, and dulling.
- Maintenance load – Whether you will keep the system organized after one busy week.
Which Tools Belong in Daily-Grab Zones
Daily-grab zones should hold the tools you use during normal weeknight cooking without thinking. If you cook dinner 4 to 6 times per week, this zone usually includes items used on most cooking days rather than one-off gadgets.
Core prep and heat tools belong here: a chef’s knife or primary knife, a cutting board you actually use, a basic skillet, a saucepan or two, stirring and flipping utensils, and everyday measuring tools. Cleanup tools you touch constantly, such as a sponge and scrub brush, also deserve an easy-to-reach spot.
Good daily-grab candidates include:
- Main cutting tools: Chef’s knife or primary knife, utility knife, bench scraper.
- Common prep helpers: Mixing spoon, whisk if you use it for eggs or sauces, measuring spoons, can opener.
- Daily cookware: Skillet, saucepan, sheet pan used often if you cook in the oven.
- Frequent utensils: Slotted spoon, spatula, tongs you actually use, ladle if you make soups.
- Everyday serving and portion tools: Pasta scoop if you use it, small serving spoon, drip-free measuring cup.
- Cleanup essentials: Dish brush, sponge, paper towel holder if your setup is counter-based.
Keep each tool family on the same movement line as the cooking task. If you prep at the counter left of the stove, store daily cooking tools on that side. If you prep at the island, use the drawers closest to the island’s cook line.
Daily storage has clear tradeoffs:
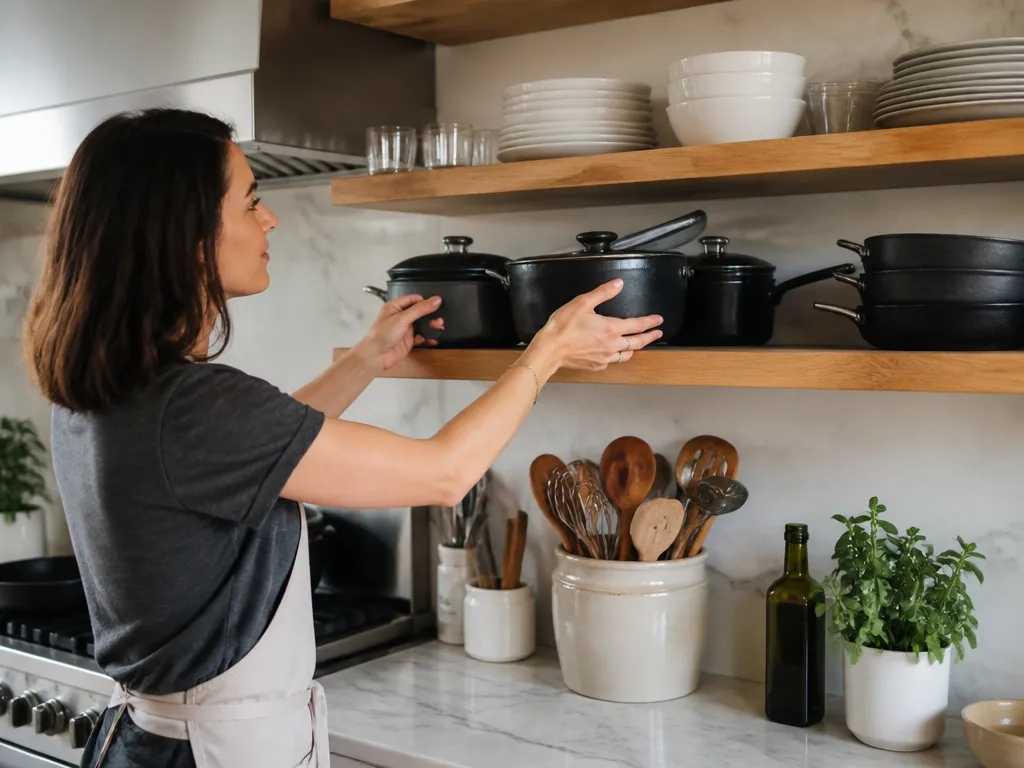
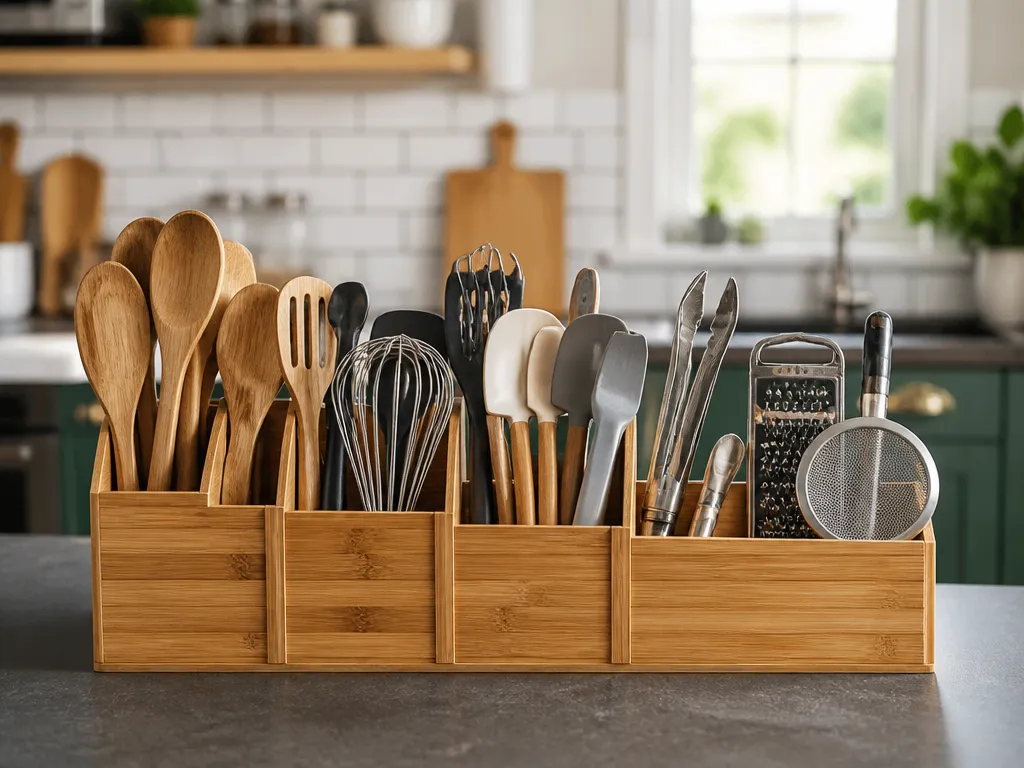
- Counter storage feels fast, but it creates clutter. When counter space is tight, drawers or a utensil crock near the stove work better.
- Hanging tools save drawer space, but they can collide. Use hooks only for long handles that hang clear of walkways and work surfaces.
- Putting everything in the daily zone defeats the purpose. A zone with 40 items becomes difficult to scan, so your hands start searching.
How To Group Weekly Tools by Task Type
Group weekly tools by the job they perform rather than by their physical category. Chopping, baking, braising, grilling, and holiday preparation each deserve a contained task set in the same secondary zone.
If one night per week involves specialized prep, keep that equipment together in a spot you can reach without disrupting the rest of the kitchen. The weekly zone can tolerate slightly more friction than the daily zone because you are usually preparing for a planned meal.
Use these task clusters as a starting point:
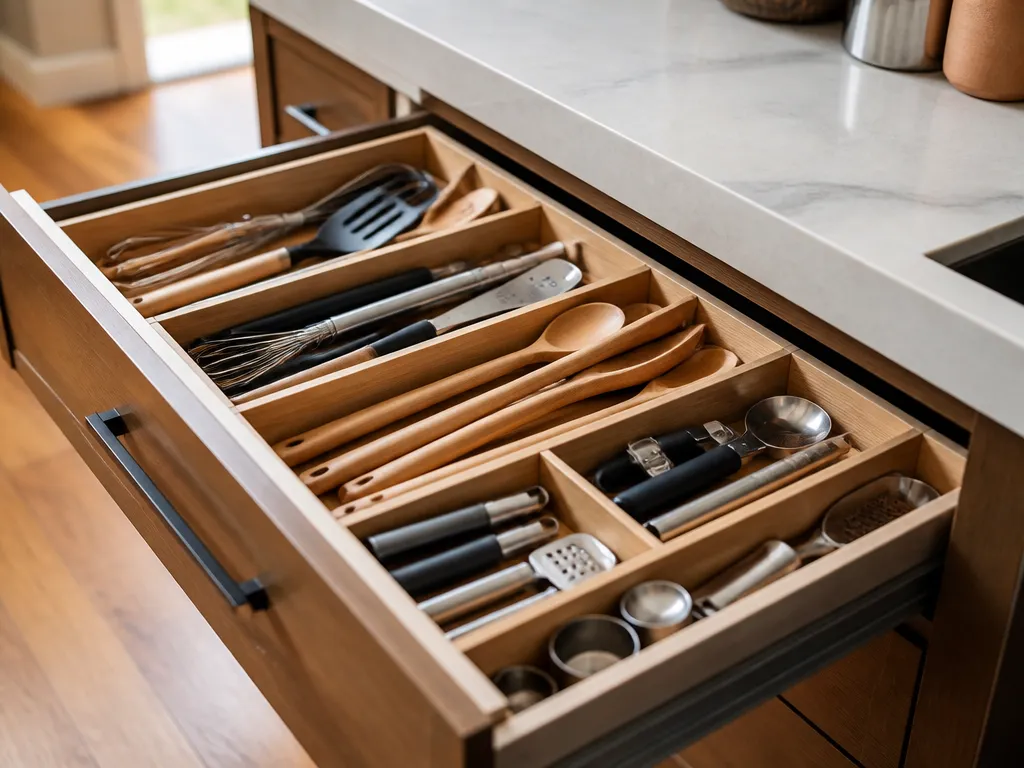
- Chop and prep cluster: Extra knives, mandoline if safe and used, vegetable peeler, zester, food scale if weekly.
- Cook and sauté cluster: Second skillet, grill pan, wok if occasional, roasting rack.
- Bake and roast cluster: Springform pan, loaf pan, muffin tin, baking sheet you do not use daily.
- Mix and bake cluster: Stand mixer accessories if weekly, piping bags, dough scraper, sieve.
- Sauce and strain cluster: Fine mesh strainer, colander, cheesecloth, gravy separator.
- Upper cabinets – High but reachable with a step stool.
- Deep cabinet shelves – Best when tools sit inside bins that slide out.
- Back-of-cabinet storage – Useful for contained, labeled sets.
- If you will likely forget where it is, store it somewhere visible or labeled.
- If you remember you need it, you can store it deeper.
- If it is fragile or safety-sensitive, avoid tight stacks where it can get knocked over.
- Higher storage slows retrieval. That is acceptable for occasional items.
- Bins reduce searching but require setup. Labels are essential for long-term success.
- Deep storage hides items. Use bins with pull tabs or front-facing labels so you can see what you are grabbing.
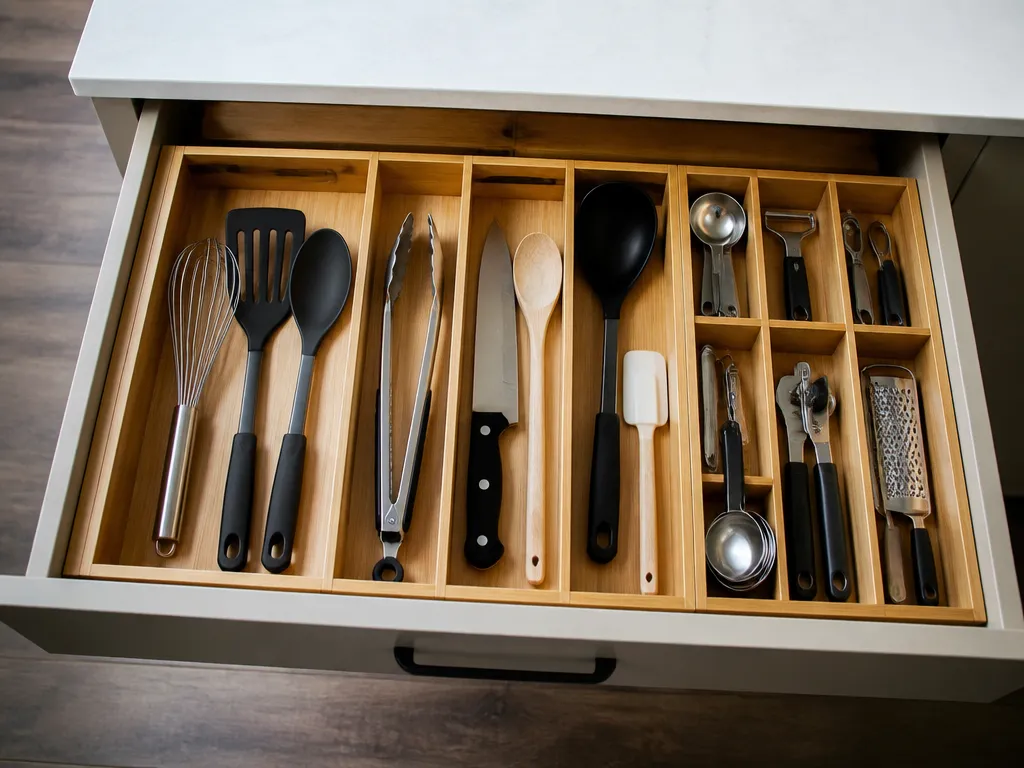
- Knives and cutters: Choose protected holders or drawer inserts that keep blades from contacting other items.
- Spoons, spatulas, and ladles: Use a utensil crock or divided insert so pieces do not nest and you can pull out one at a time.
- Long-handled tools: Store tongs, whisks, and rolling pins on hooks, a hanging bar, or a vertical holder that prevents bending.
- Whisks, strainers, and sieves: Store them upright or suspended so fine mesh does not deform.
- Cutting boards and sheet pans: Store them standing or stack them with separators rather than cramming them flat against heavy items.
- Small prep gadgets: Keep zesters, garlic tools, and peelers in small compartments so you can find them without dumping a drawer.
- Pans and bakeware: Use vertical stacking where possible, with separators to reduce scratching and warping.
- Baking accessories: Store springform pans and muffin tins in labeled bins by size.
- Late-season prep: When you finish your last seasonal cook, clean and dry the tools immediately, then move the entire set back into its labeled container.
- Activation moment: When you do the first seasonal cook of the next cycle, move that set into the weekly zone for one week, then keep it accessible through the season.
- End-of-usage check: Once seasonal cooking stops for 2-3 weeks, return the set to its seasonal storage spot.
- How many times you leave the prep area to retrieve a missing tool.
- How long you wait while searching for something; a rough estimate is fine.
- Whether you use the wrong tool first because the right one is hard to find.
- Search count: The target is fewer searches than at baseline.
- Retrieval distance: The target is more tools coming from the nearest zone.
- Return friction: The target is putting tools away immediately instead of parking them somewhere else.
- The daily zone is overloaded. You cannot scan the contents, so grabbing takes longer.
- Weekly task tools are scattered. You pull one item, then hunt for its partner tools.
- Storage does not match the tool shape. Items jam, rattle, or come out tangled, forcing you to fix storage while cooking.
| Meal-specific cluster: Taco tools, ramen tools, slow-cooker accessories if you use them only sometimes. | Storage approach | Key spec | Best for | Tradeoff |
|---|---|---|---|---|
| Drawer dividers (modular) | Fits multiple tool shapes | Weekly task clusters | Setup takes 30-60 minutes | |
| Counter utensil crock near stove | Open-top quick grab | Stir/flip/spoon tools | Counter clutter if overfilled | |
| Wall rail + hooks | Clear line of sight | Long-handled tools | Can tangle if hooks are too close | |
| Shelf bin system | Stackable bins with labels | Seasonal and occasional | Slower to retrieve during busy cooking | |
| Vertical knife/cutter holder | Blade protected, gravity-stored | Cutters, shredders, grating tools | Needs safe placement away from kids | |
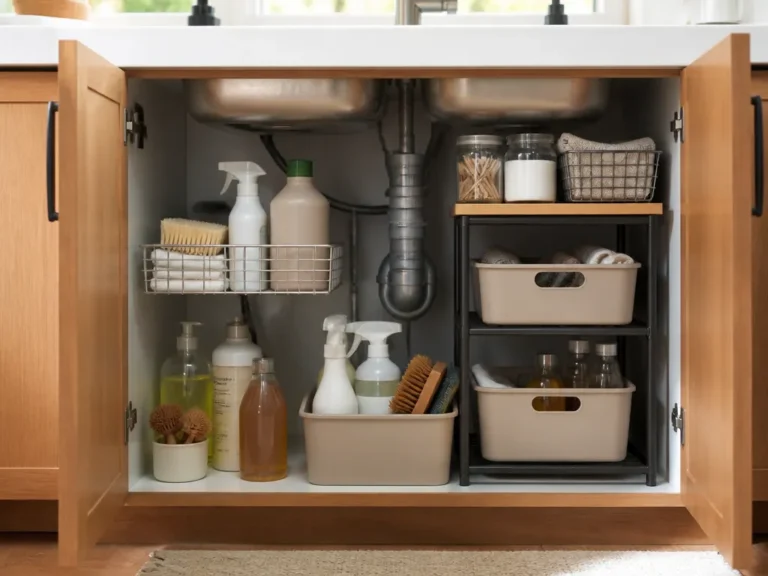
| Under-sink pull-out shelf | Dead-space recovery | Cleaning/occasional specialty | Not ideal for greasy kitchen items |
Account for how tools behave in storage. Tongs can bend in tight spaces, and fragile ceramic bakeware can chip when stacked. Weekly clusters should give awkward shapes enough room to stay intact.
Where To Store Seasonal and Occasional Tools
Store seasonal and occasional tools where you can reach them without disturbing daily zones. Upper cabinets, deep shelves with sliding bins, and labeled back-of-cabinet containers all work, depending on how often you retrieve the items.
In most homes, seasonal tools fit into one of three places:
Occasional tools include rarely used gadgets, specialty pans, extra bakeware, and holiday-serving pieces. Keep them as a contained unit rather than scattering them across several cabinets.
Let retrieval frequency determine how deep or high an item goes. A tool used only 1-2 times per season can occupy a less convenient spot. One used 6-10 times per year belongs in a pull-out bin or mid-level cabinet so storage does not discourage you from using it.
Use these placement rules:
The main tradeoffs are straightforward:
What Storage System Fits Each Tool Shape
Match the storage system to the tool’s shape. Flat tools, long-handled utensils, delicate blades, and heavy cookware need different amounts of clearance and protection. One organizer rarely handles all of them well.
Use these shape-to-storage matches:
Think in terms of zones plus shapes. A divider that works for cookie cutters may be useless for tongs that need vertical space. A shelf bin that holds seasonal serving platters may not protect a whisk from bending.
Measure and test before buying organizers. Pull out one drawer, place the proposed divider inside, close the drawer, and return the tools in a single motion. If you have to force the drawer shut or cram items sideways, choose a different system.
How To Set a Rotation Schedule for Seasonal Items
Rotate seasonal tools when you first use them, not when a date on the calendar says the season has started. That trigger keeps storage tied to your actual cooking habits and prevents seasonal items from becoming permanent clutter.
Create one seasonal container, or at least one labeled bin category, for each seasonal family. Keep the complete set together so you can pull it out at once and return it in one action.
A simple rotation schedule for most US households looks like this:
The first rotation takes time because you are making decisions. Later rotations become easier as long as the set stays together. Return small accessories to the container every time. If a tool is dirty, clean it later, then put it back with the set instead of leaving it in a different drawer.
Limited cabinet access does not prevent rotation. Keep a seasonal bin near the prep zone during its active season, then move the full bin to upper storage when cooking slows. Moving one container creates fewer “where did I put that?” problems than moving individual tools.
How To Verify Your Setup Saves Prep Time
A frequency-based arrangement works when it reduces tool travel and search interruptions during a repeatable meal. You do not need a stopwatch app, but you do need to compare the same task before and after reorganizing.
Choose one meal you make at least once per week and run a baseline test before changing the kitchen. During the cook, record:
Reorganize the kitchen using your frequency zones and task clusters, then repeat the same meal test after restoring the kitchen completely.
Track three parts of the result:
If the setup does not save time, check these likely problems:
Adjust based on what you actually do. If you keep searching for one particular tool, move it closer to the cooking line even if your first estimate classified it as weekly. Real behavior should override the original plan.
FAQ
How do I decide if a tool is “daily” or “weekly”?
Use your actual cooking rhythm. After 3 to 5 typical meals, mark each tool based on whether you used it on most cooking days or only during planned sessions. If you are unsure, make tools you touch mid-cook, such as main spatulas and strainers, daily defaults. Reassess after 1 week.
What is the cheapest way to set up tool storage by frequency?
Start with drawer dividers and one labeled bin system. Dividers handle small daily and weekly tools without new shelving, while bins contain seasonal sets so they do not migrate. Skip expensive custom organizers until you measure your drawer sizes and confirm that the tool shapes fit cleanly.
Will moving knives and cutting boards closer together increase safety?
It can, provided you store blades in a protected holder and keep cutting boards from sliding. Use a blade-safe holder or drawer insert that prevents edge contact, and store boards upright or separated so heavy items do not topple. Avoid crowded spots near the stove where hands can bump handles during cooking.
How long does it take to reorganize kitchen tools this way?
Plan on 2 to 4 hours for a typical kitchen the first time, mainly because you are deciding zones and building clusters. Faster cooks can finish in about 1 to 2 hours if they already know their weekly tool families. The second rotation is usually much quicker because seasonal sets stay together.
What’s the most common mistake when organizing by cooking frequency?
Overstuffing the daily zone is the most common mistake. When too many tools sit within easy reach, you lose visual scanning and search more. Scattering task partners is another frequent problem – for example, storing a strainer and colander in different drawers and having to hunt mid-recipe.
The Arrangement That Saves the Most Time
Put daily-grab tools in the closest practical spot to your prep and cooking line, usually where your hands already move during weeknight meals. Most daily zones need core knives, key utensils, cookware, and a few cleanup essentials – not every tool you own.
Store seasonal and occasional tools in upper cabinets or deep labeled bins, preferably as complete sets you can pull out together. Match storage to tool shape, protect blades and fine mesh, and rotate by cooking trigger instead of the calendar. Finally, run a repeatable prep test and track search interruptions and retrieval distance.