How To Clean Silicone Dish Scrubber
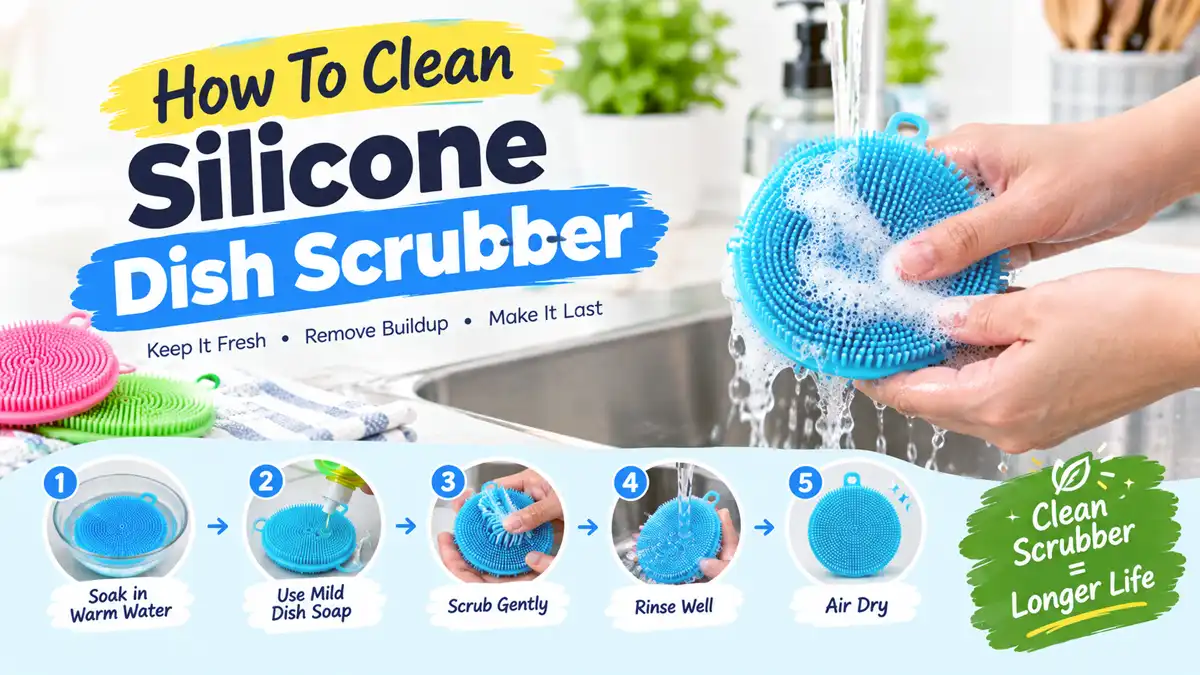
A silicone dish scrubber should feel clean, smell neutral, and have no slimy film after washing. Rinse it with warm water, soak it in hot soapy water for 5-10 minutes, scrub between the bristles, and let it dry completely. Silicone is forgiving, so this routine handles most food oils, starch, and everyday grime.
For odors or stubborn buildup, add a sanitizing soak with diluted bleach or vinegar. Use about 1 tablespoon of bleach per 1 gallon of water, keep the scrubber wet for several minutes, then rinse it thoroughly. Never mix bleach with vinegar or other cleaners. Replace the scrubber if it is torn, warped, persistently discolored, or still smells after repeated cleaning.
Key Takeaways
- Skip harsh tools. Metal scrubbers can damage the surface and create places for grime to collect.
- Check the care label. If the brand says “dishwasher safe,” follow that guidance.
What You Need Before Cleaning a Silicone Dish Scrubber
Gather dish soap, a sink or container, and either diluted bleach or distilled white vinegar if the scrubber needs sanitizing. A large scrubber or one with a handle and hook should be soaked in a container deep enough for water to reach every bristle area.
Check the care label on the scrubber or its packaging before using hot water, bleach, or a dishwasher. Some silicone dish scrubbers are dishwasher safe, while others contain mixed materials that require hand washing. Pay close attention to exposed seams, removable cores, metal attachments, and hanging loops that can trap water.
Aim for a scrubber that feels clean, smells neutral, and has no greasy or slippery coating. Cloudiness, mild discoloration, or a sour smell usually means the scrubber needs more than a quick rinse.
Why Silicone Scrubbers Hold Odors and Grime
Silicone is non-porous, so it does not absorb stains like some natural fibers. Food residue still collects on the surface, in bristle valleys, around seams, and underneath raised bristles. Grease and starch can dry into a film that a quick rinse will not remove.
The scrubber gets harder to manage when it stays damp for hours. Trapped water, leftover grease, and soap residue can create the odor that returns soon after washing. Drying is therefore part of cleaning, not an optional final step.
Cleaning frequency depends on what you scrub and how quickly the scrubber dries. One used on greasy pans and casserole dishes needs deeper cleaning more often than one used for light daily dishwashing.
Step-by-Step Silicone Scrubber Cleaning
This routine handles most everyday messes, including food smears, grease, and mild odor.
- Rinse right away. Run warm water through the bristles for 20-30 seconds to flush out loose food particles.
- Soak in hot soapy water. Fill a bowl or sink with hot water, add dish soap, and soak the scrubber for 5-10 minutes.
- Scrub the bristles. Use your hands or a soft brush to work the soap through the silicone ridges for 30-60 seconds.
- Rinse thoroughly. Hold the scrubber under running water until no slick soap film remains.
- Sanitize if needed. Use the bleach or vinegar method if the scrubber smells, feels slimy, or gets frequent heavy use. Rinse well afterward.
- Dry completely. Stand the scrubber upright or hang it so water can drain from beneath the bristles.
How to Use Diluted Bleach
Mix the bleach with cool or room-temperature water. A common starting point is about 1 tablespoon of bleach per 1 gallon of water. Soak the scrubber for several minutes, then rinse it very thoroughly and let it dry fully.
Never mix bleach with vinegar or any other cleaner. If the scrubber has a metal component, check whether bleach contact could corrode it. Do not use bleach at full strength or leave the scrubber soaking longer than needed.
How to Use Vinegar
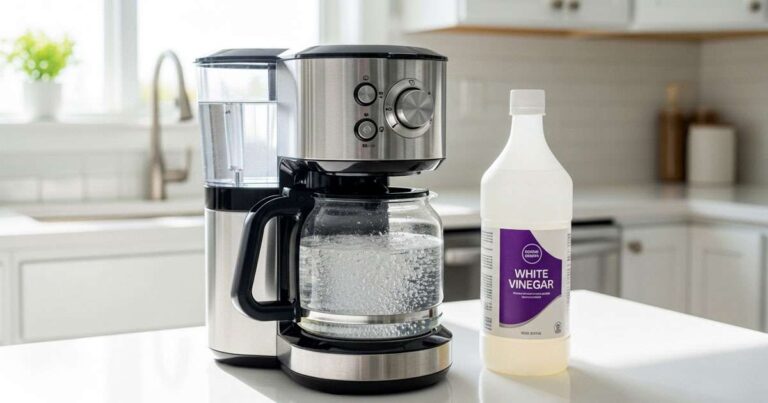
Submerge the scrubber in a bowl of undiluted distilled white vinegar, or dilute it with water if the vinegar is very strong. Let it sit for 15-30 minutes, then rinse well and air-dry.
Vinegar can help with odors and mineral residue. It is also a gentler option if you prefer to avoid bleach. Rinse thoroughly so vinegar does not leave a lingering smell on the scrubber or dishes.
Techniques for Grease, Food, Odor, and Discoloration
The dirtiest areas are usually the bristle valleys and the underside, where water and food residue collect. Your hands may be enough for loosely packed bristles, but a soft tool helps with tight bristles or sticky film.
- Greasy film: Soak the scrubber in hot water and dish soap first, then apply extra pressure to the underside and between the bristles.
- Stuck-on food: Use a plastic spatula or an old toothbrush to loosen crumbs before soaking.
- Odor: Use a sanitizing soak, then dry the scrubber upright for several hours. Heavy odor may require leaving it to dry overnight.
- Discoloration: Clean it normally first, then try a vinegar soak. If the discoloration remains but the scrubber is odor-free, it may be cosmetic.
Dry the Bristles With Airflow
Water trapped under the bristles causes the familiar “why does it smell even after I washed it?” problem. Shake off excess water after rinsing, then hang or stand the scrubber so air reaches both sides.
A dish rack that allows airflow works better than a towel or a flat counter. If the scrubber rests in a puddle, move it to a spot where water can drain away. A closed container also holds moisture against the silicone and can bring the odor back.
Use Hot, Not Boiling, Water
Hot water speeds up degreasing and helps dish soap work faster. Boiling water is usually unnecessary and may warp certain designs, especially scrubbers with attachments or adhesives.
Use hot tap water unless the care label says otherwise.
A Cleaning Schedule That Prevents Buildup
Clean the scrubber after each day of use and give it a deeper treatment on a predictable schedule. Waiting until it looks grimy or smells strongly makes dried food and grease harder to remove.
For a general household, a quick wash after everyday use and a deeper clean with soaking and sanitizing at least once a week works well when the scrubber handles greasy cookware. For lighter dishwashing, cleaning every 2 weeks may be enough if the scrubber dries quickly between uses.
Practical Cleaning Schedule
- After heavy use: Rinse after handling grease, pasta, or eggs, then wash with dish soap and dry thoroughly.
- Weekly: Soak in hot soapy water for 5-10 minutes, scrub, sanitize, rinse, and dry upright.
- Monthly: If you use the scrubber constantly, complete a full sanitizing treatment even if it does not smell.
Store the Scrubber Where It Can Drain
Leaving the scrubber in a puddle quickly recreates the buildup you just removed. Store it where water can drain fully and air can circulate between uses.
Hang scrubbers with a loop, or stand them upright with the bristles exposed to air. If you keep one in a closed container, dry it first and leave enough ventilation to prevent moisture from collecting again.
Mistakes That Make Silicone Scrubbers Smell
Most cleaning problems come from the routine, not the silicone itself. Fix the way you rinse, scrub, sanitize, and dry the scrubber, and recurring odor often becomes easier to control.
- Skipping drying: A damp scrubber in a dish rack becomes odor-prone quickly.
- Scrubbing with metal: Metal can roughen the silicone surface and create more places for grime to stick.
- Using concentrated cleaners: Full-strength bleach, strong acids, and aggressive abrasives can damage or degrade silicone over time.
- Failing to rinse after sanitizing: Bleach or vinegar residue can leave smells or irritate your hands and dishes.
- Waiting too long to clean: Dried-on food is harder to remove and may require multiple cleaning cycles.
- Ignoring the handle: A clean set of bristles cannot compensate for a dirty, damp handle or base.
Never Mix Bleach and Vinegar
Bleach and vinegar should never be used together. If you use vinegar first, rinse the scrubber well and let it dry before using diluted bleach later. Mixing the two cleaners can create dangerous fumes.
A Two-Pass Method for Persistent Slime
A scrubber that stays slimy after washing needs separate degreasing and sanitizing steps. Soaking it briefly in sanitizer will not remove a thick layer of oil or soap film.
First, soak the scrubber in hot soapy water for 10 minutes and scrub it thoroughly. Next, use either the diluted-bleach method or the vinegar method, then rinse well and dry it upright for several hours.
Rescue Soak for Stubborn Film
For a scrubber that still feels slippery, extend the hot soapy soak to around 20-30 minutes. Scrub the bristle valleys and underside again, then sanitize, rinse thoroughly, and dry completely.
This longer first pass gives dish soap more time to loosen oils and residue before the sanitizing step.
Clean the Handle and Attachments
Handles, loops, bases, seams, and removable cores can trap water just like bristles do. Rinse and sanitize those parts as well, following the care label for mixed materials and metal components.
Dry the entire scrubber, not just the bristle surface. A damp handle or hanging loop can keep the rest of the scrubber smelling stale.
Sanitize Based on the Condition
A lightly soiled scrubber usually needs only a hot-soapy wash, rinse, and thorough drying. Sanitizing after every use can be unnecessary and may leave a bleach or vinegar odor if rinsing is incomplete.
Use a sanitizing soak when the scrubber smells, feels slimy, handles greasy cookware frequently, or has been left damp. Rinse it thoroughly every time.
When to Replace a Silicone Dish Scrubber
Replace the scrubber if the silicone is torn, warped, cracked, or visibly weakening. Damage creates crevices that are difficult to clean and may prevent the scrubber from drying properly.
Persistent discoloration alone does not always mean the scrubber is unusable. Clean it normally and try a vinegar soak first. If the color remains but the scrubber is intact and odor-free, the change may be cosmetic. Lingering smells after repeated cleaning are a stronger reason to replace it.
FAQ
How often should I sanitize a silicone dish scrubber?
For light daily dishwashing, weekly sanitizing is usually enough. If you scrub greasy cookware, sanitize weekly, depending on odor and residue.
Drying between uses matters just as much. A scrubber that stays damp will smell sooner, even if you sanitized it recently.
Can I put a silicone dish scrubber in the dishwasher?
Many silicone dish scrubbers are dishwasher safe, but follow the care label. If it is dishwasher safe, run a normal cycle and dry the scrubber thoroughly afterward.
If there is no label or the scrubber has mixed materials, such as metal attachments, hand washing with optional sanitizing is safer.
Does bleach damage silicone dish scrubbers?
Occasional use of diluted bleach is generally fine when you rinse the scrubber thoroughly afterward. Do not use bleach at full strength or leave the scrubber soaking for long periods beyond what you need for sanitizing.
If the silicone begins to weaken or crack, or a persistent odor remains after rinsing, switch to vinegar-based cleaning and check the manufacturer’s care instructions.
What is the fastest way to clean a silicone scrubber after cooking?
Rinse it under hot water immediately, then wash it with dish soap and hot water for about 1-2 minutes. If it still feels greasy, soak it for 5-10 minutes in hot soapy water and scrub it again.
Dry the scrubber upright as soon as you finish rinsing so it does not hold moisture as it cools.
Why does my silicone scrubber smell after cleaning?
The usual causes are trapped moisture, leftover grease, and soap film. Scrub the underside and bristle valleys, not just the top surface. Then sanitize with a diluted method if the odor returns quickly and dry the scrubber upright or hang it until completely dry.