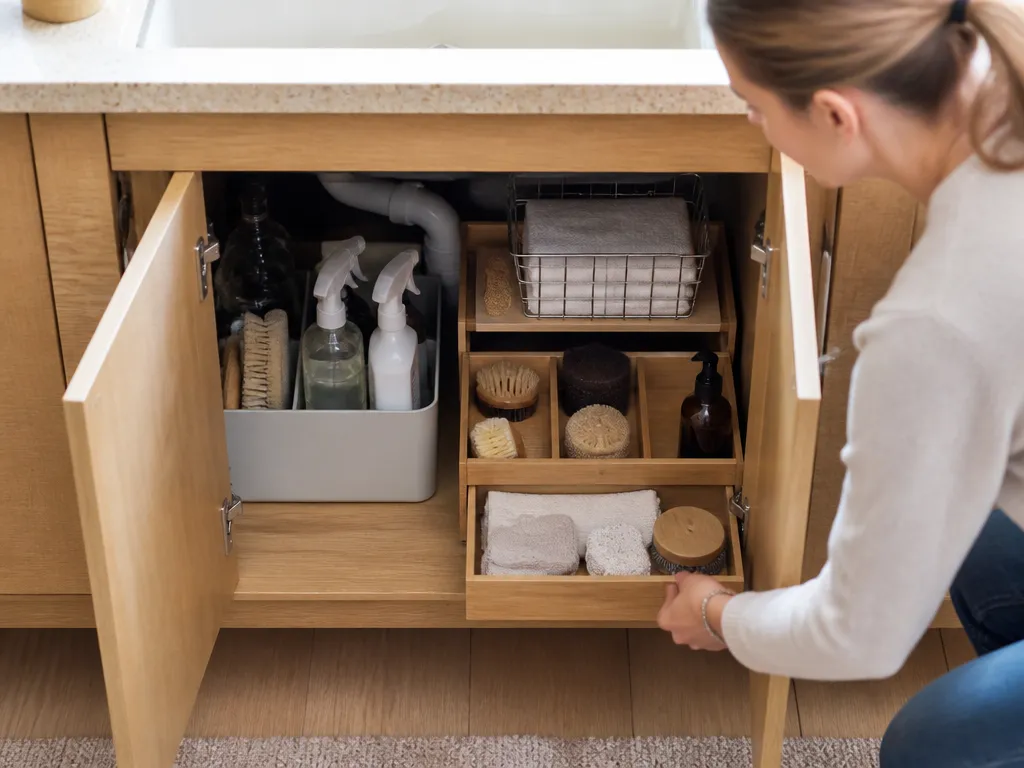
How To Organize Under Cabinet Space
Under-cabinet space fills with “we’ll store it later” clutter fast. A few measurements, the right containers, and zones based on how often you use each item can turn it into practical storage for cramped garages, spice shelves, cleaning supplies, and migrating junk-drawer items.
Keep under-cabinet storage tidy by storing only what you use, grouping items by category, and choosing containers that fit the opening. Put 1-2 daily-use categories in front bins, keep bulk items in deeper pull-outs, and reserve wall hooks for tools you grab weekly rather than trying to hang everything.
Key Takeaways
- Measure first. Check cabinet width, depth, and under-cabinet clearance before buying bins.
- Organize by frequency. Put daily-use items in the easiest-to-reach area and backups deeper inside.
- Match containers to the footprint. Correctly sized bins and trays leave less room for clutter.
- Anchor organizers securely. Rails and quality hook mounts keep bins from sliding or tipping.
- Control lids. Store them vertically or in a dedicated organizer so they do not spread into other categories.
- Reset monthly. Spend a few minutes sorting, removing duplicates, and returning items to their proper zones.
How To Organize Under-Cabinet Space Without Clutter
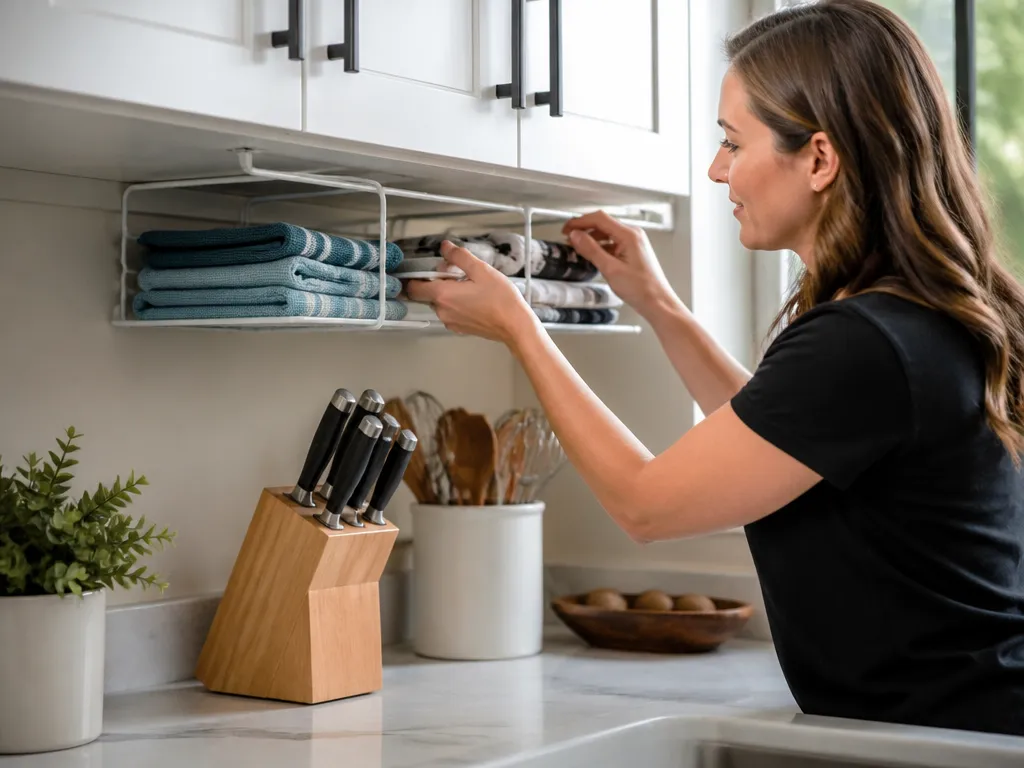
Make under-cabinet storage deliberately simple. Clutter starts when everything shares one pile, so decide what belongs there before choosing an organizer. My rule is straightforward: keep infrequently used items only when they suit a back zone; move items that are rarely useful or difficult to access elsewhere, such as in a closet, pantry, or higher cabinet.
Clear the area completely, wipe the surfaces, and inspect anything that could interfere with storage. Look for loose cabinet bottoms, sharp edges, and gaps where bins might snag. If the cabinets have doors, check that containers will not block the door swing or catch on drawer pulls.
Create zones based on how often you reach for each item:
- Front zone: Daily-use items such as sponges, dish brushes, and small tools
- Middle zone: Weekly-use items such as wraps, backups, and small accessories
- Back or deep zone: Seasonal or rarely used items such as extra filters and spare rolls
Categories alone will not prevent clutter if the containers are too large. Oversized bins become drop zones because they leave room for random items. Choose bins that fit the available footprint, then label them. A label is not decoration; it makes random dumping less convenient.
What Under-Cabinet Items Fit Best
Under-cabinet storage works best for small, flat items you want close to your work area. Cleaning and cooking supplies are good candidates, while heavy, tall, or slippery items need a stable organizer or a different storage location.
Good choices include:
- Cleaning tools and refills: Scrub sponges, steel wool, dish brush heads, and small scrub pads
- Kitchen accessories: Foil and plastic wrap holders, small tongs, measuring spoons, and extra rubber bands
- Wrap and storage supplies: Sandwich bags, parchment rolls, and storage lids in a dedicated organizer
- Spices and cooking basics: Spice jars, seasoning shakers, and small oil or seasoning bottles, if the cabinet design allows
Do not place items that leak, melt, or stain in an open area. Avoid blocking airflow if the kitchen runs hot, especially near vents. Aerosol sprays also deserve caution under cabinets because a spill can create a mess and trapped fumes can become a problem.
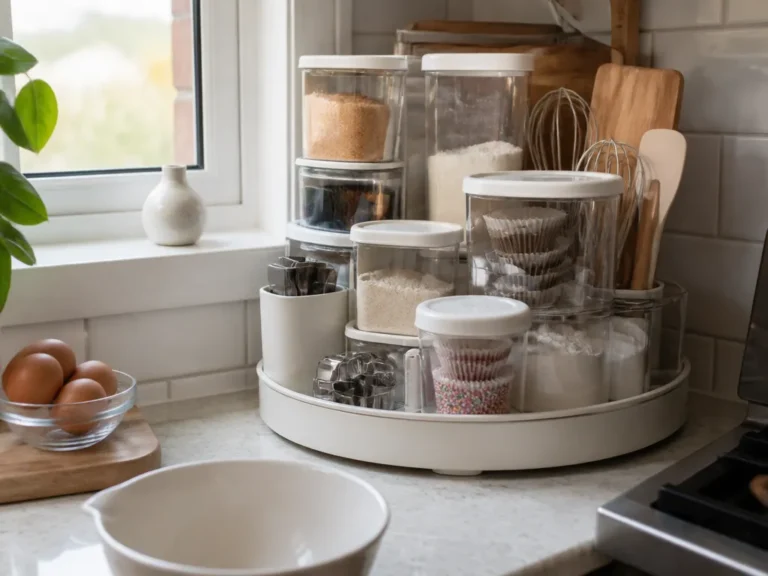
Spice jars often look convenient on a tray until the tray tips when you grab one. If you store spices under a cabinet, use a rail system with a lip or a bin with a non-slip base. Otherwise, the arrangement is unstable by design.
Use a simple test: if you can carry an item one-handed without wobbling, it may fit. If it requires two hands or tilts when lifted, store it somewhere sturdier.
How Much Storage You Need by Cabinet Width
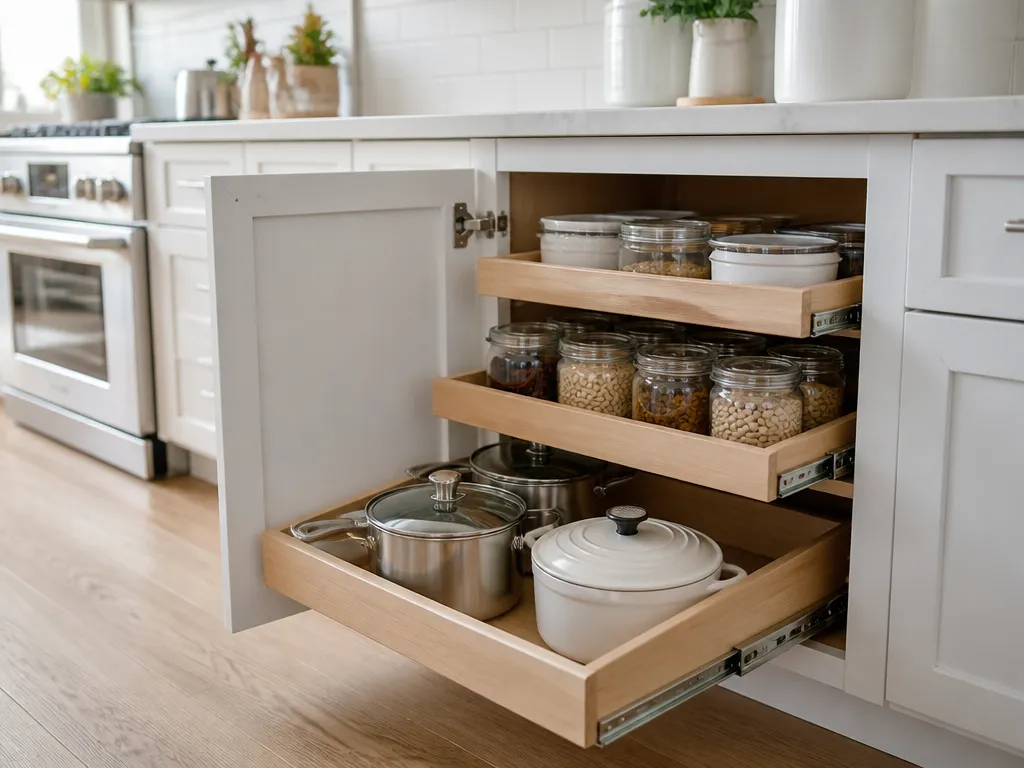
Measure the usable opening across the cabinet face, not the countertop edge. The width determines the organizer footprint and the number of categories you can store without crowding. Leave a little clearance so containers slide in and out without scraping.
| Cabinet Width (typical) | Planning Footprint | Suggested Organizer Mix |
|---|---|---|
| 12 in (narrow) | 1 front tray/bin + 1 small back slot | 2 units total, keep categories minimal |
| 18 in (small standard) | 2 shallow bins + 1 slim organizer | 3 units total if they are narrow |
| 24 in (most common) | 3 bins total, including a deeper one | 3-4 units total with one “bulk” zone |
| 30 in (wider) | 4 bins total, add pull-out for frequent items | 4-5 units total if stable and labeled |
| 36 in (large run) | Multiple zones with rails | 5-7 units total, grouped by frequency |
Do not force a container into an exact opening. A small gap gives you room to pull it out without scraping, while an oversized bin makes every item harder to reach. The goal is a container that slides in and returns easily.
Older homes often have odd cabinet widths. Use the same process: measure the opening, divide it into practical zones, and choose containers that fit those zones. The front should be reachable without leaning, and the back should be accessible without digging through a pile.
If the clearance is very shallow, treat the area as tray-only storage. Flat trays, dividers, and surface-safe bins can still hold small supplies without requiring deep pull-outs.
Choosing Bins, Trays, and Pull-Out Organizers
A good organizer stays put when you pull it. If the bin slides forward every time you reach inside, the system will become a daily mess.
Evaluate bins and trays by four features:
- Fit: Match the width and depth to the available space so items do not bounce around in empty gaps.
- Lip or rail: A raised edge helps keep jars and containers from falling forward.
- Grip base: A non-slip mat or bottom reduces movement on smooth cabinet surfaces.
- Modularity: Stackable or compatible sizes make it easier to expand without starting over.
Pull-out organizers make deep storage easier to reach. They suit items such as extra cleaning supplies and backup cooking tools, especially when you use them often. Look for smooth slides and a firm stop so the bin does not slam or slip out.
| Organizer Type | Best For | Biggest Trade-off |
|---|---|---|
| Shallow trays | Flat items (sponges, small tools) | Limited capacity for bulky items |
| Bins with dividers | Category separation (lids, wraps, accessories) | Dividers reduce space if items are oversized |
| Rail-mounted bins | Frequent grab items that need stability | Installation time to mount rails |
| Hook-mounted tool holders | Lightweight tools and utensils | Hooks are bad for heavy or leak-prone items |
| Pull-out drawers | Deep access with tidy zones | Costs more and needs precise fit |
Spice jars and bottles need protection from tipping. Use a tray with a lip or a bin with raised dividers so each container stays upright. Lids need their own vertical or stacked organizer because they spread horizontally when they have room to shuffle.
Check weight capacity before storing bulk dish soap bottles or metal tools. Lightweight bins can sag or pull away over time, so heavier items need organizers mounted with rails, screws, or approved anchors.
Installing Rail Systems and Hook Mounts Securely
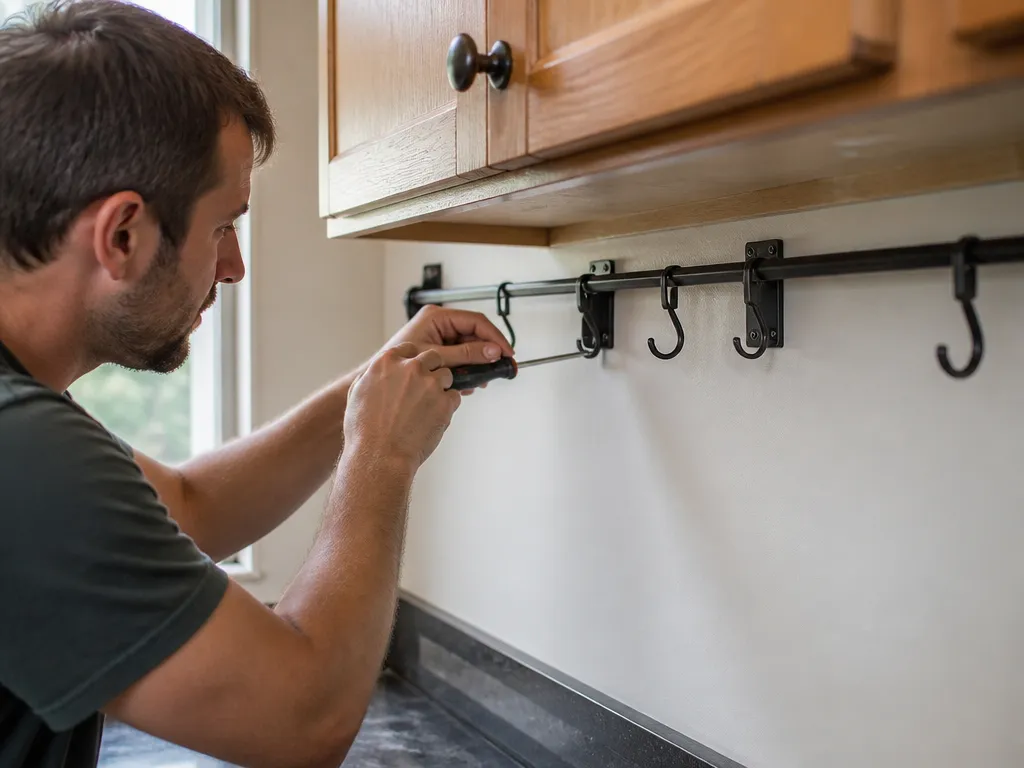
Rails and hooks need to resist repeated pulling, not merely hold an item while it sits still. Mount them to a strong surface whenever possible. Cabinet sides and underside frames generally support sturdier fasteners than thin particle-board panels. If the bottom panel is thin, attach to a stronger member behind it or use a mounting method rated for light loads.
Use this checklist before drilling:
- Mark level lines. Straight rails help bins pull out without binding.
- Check clearance. Leave room for the bin thickness and its full pull path.
- Plan bin positions. Put the most frequently used items where you can reach them without bending.
- Test stability. Pull empty organizers several times before loading them.
Install one rail first, then test-fit the bin or track. If the system catches even slightly, correct the alignment before adding weight. Small problems become more noticeable once the organizer is loaded.
Hook mounts require less work but more careful placement. They suit items you grab and hang back quickly, such as a scrub brush holder or lightweight measuring tools. Avoid using them for heavy items or anything that could slip off and fall into a workspace. Position hooks so hanging items do not extend into foot traffic or beyond the countertop edge.
A mixed setup usually works best: use rails for small containers and hooks for quick-grab tools. That combination reduces the number of bins you need and keeps frequently used items from migrating into random corners.
Best Placement for Lids, Spices, and Cleaning Supplies
Lids, spices, and cleaning supplies need separate layouts because they create different problems. Lids slide and spread, spices tip easily, and cleaning supplies can drip onto cardboard or particle board.
Lids: Store them vertically in a lid organizer, in a stacked bin with dividers, or in a tray designed for lids. Keep them in the front or middle zone so you can remove one without pulling out the entire stack. If lids sit too deep, you will eventually dump them out to find the right size.
Spices: Keep them upright and visible. A slim rail-mounted bin or a shallow divided tray works better than a wide, open bin when access is limited. Group spices by use rather than alphabetically. Salt, pepper, garlic powder, and chili powder usually deserve the easiest-to-reach section.
Cleaning supplies: Contain drips with a tray that has a lip or a bin with a removable liner. Place frequently used supplies in front and refills in back. Store sponge pads in a ventilated or easy-to-wipe organizer so moisture does not sit against the cabinet surface.
Use this placement rule:
- Front = grab-fast
- Middle = organized categories
- Back = backups and overflow in sealed containers
Do not mix spice bottles with wrap storage simply because both are small. Separate them with a dedicated bin or divider so lids do not spill into spices and spices do not mix with cleaning refills.
Near direct heat or steam, avoid products that can warp or degrade. Glass spice jars are usually fine, but paper-based packaging belongs in a sealed container or a more protected location.
How To Maintain Organization Month to Month
A quick reset keeps under-cabinet storage usable. The goal is to stop small amounts of clutter from becoming a new permanent layer.
Use this monthly routine, which takes 10 to 20 minutes:
- Pull out each bin or tray one at a time.
- Remove anything that belongs in another category.
- Check for duplicates and move extras to their proper storage location.
- Wipe the surfaces, then return only what you use.
- Adjust bin positions if anything is difficult to reach.
Watch for recurring patterns. If miscellaneous items keep collecting in the same front corner, that space needs a defined category bin rather than another empty spot.
Set a return standard for everyone who uses the storage: if an item cannot be put away within 10 seconds, move it somewhere else. Under-cabinet systems last when returning an item is easier than leaving it on the cabinet base or countertop.
Inspect the organizers as you reset the space. Replace a worn non-slip liner, correct a misaligned rail, or replace peeling labels. If lids are spreading again, add dividers or switch to a different organizer style.
Fewer organizer sizes usually make maintenance easier. When one category is spread across several containers, it becomes harder to track. A smaller set of bins with clear rules typically stays organized longer.
FAQ
How do I start organizing under-cabinet space if I don’t know what fits yet?
Measure the under-cabinet width and the maximum usable depth, then clear the space completely. Take inventory of the items you want to store and group them by frequency of use. Test-fit one bin or tray before buying more.
What’s the cheapest way to organize under-cabinet space?
Use shallow bins or trays with lids for categories, and place a non-slip mat under each container to prevent sliding. If you do not want to drill, choose organizers that sit securely without wobbling. Avoid oversized bins with large empty gaps because those gaps attract miscellaneous items.
Is it safe to store spices and cleaning supplies under cabinets?
It is safe when the items stay upright and sealed or contained. Store spices in stable trays or bins that prevent tipping. Keep cleaning supplies in containers that catch drips and are easy to wipe. Move anything that leaks or smells strongly to a more protected location.
How do I keep bins from sliding under the cabinet?
Add a non-slip liner under each bin or use containers with rubberized feet. If sliding continues, anchor the organizers with rails or switch to a mounted rail system. Check that the cabinet underside is level too, since even a slight tilt can make bins creep forward.
What’s the most common mistake when organizing under-cabinet space?
The most common mistake is trying to store too many categories in one open area. Lids, spices, and cleaning refills quickly turn shared bins into catch-alls, forcing you to dump items out to find what you need. Give each category its own bin or divider.