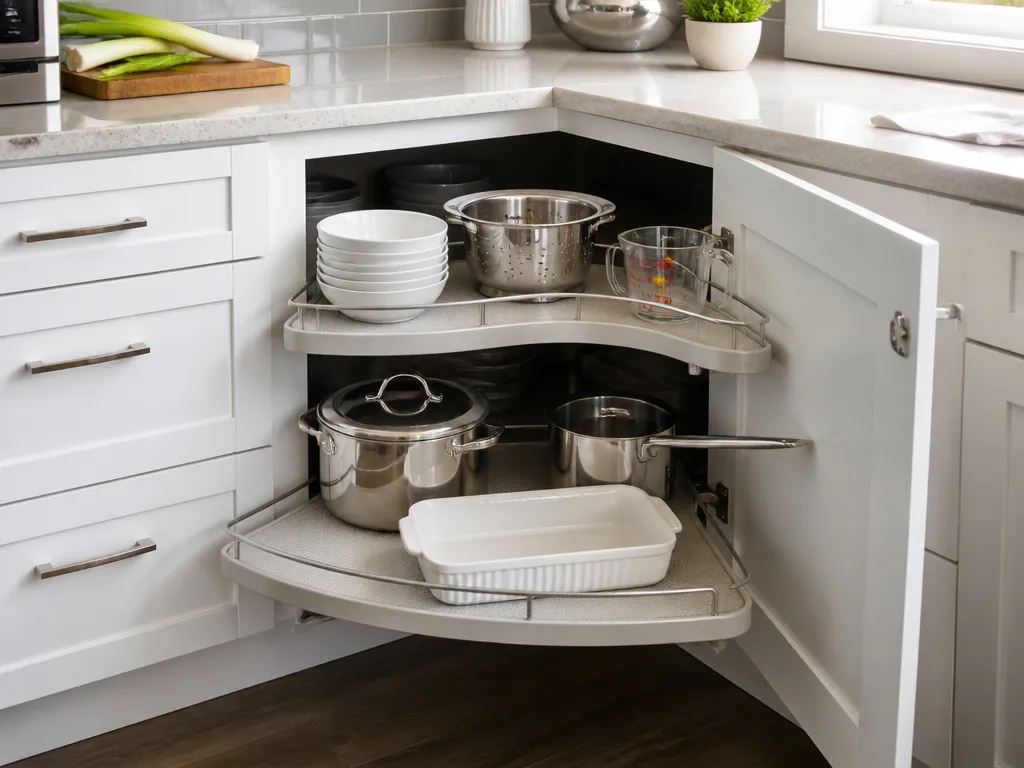
How To Organize Corner Kitchen Cabinets: 5 Smart Solutions
Corner kitchen cabinets are where good kitchen storage goes to die, because deep blind corners and odd angles make items hard to reach. The fix is mechanical (better access hardware) plus behavioral (clear zones, right-size containers, and a simple restocking routine). This tutorial shows you how to organize corner kitchen cabinets using practical upgrades like lazy Susans, pull-outs, and door storage, then how to keep it working day after day.
Corner kitchen cabinets become easy to use when you combine access hardware with a “most-used up front” layout. Use a rotating lazy Susan for round-ish items, pull-out shelves for straight reach, and vertical dividers for canned goods. Keep infrequently used cookware on the back or top, and label everything so items always return to the same spot.
Key Takeaways
- Start by clearing out. Take everything out so you can measure usable space and decide a new layout.
- Choose the right hardware. Lazy Susans and pull-outs beat fixed shelves for deep corner blind spots.
- Zone by frequency. Keep daily tools at eye level, seasonal or backup items deeper in the cabinet.
- Control the clutter. Use matching bins, dividers, and labels to prevent “one-off” chaos.
- Optimize container sizes. Containers should fit the cabinet geometry so they slide in and come out cleanly.
- Maintain with a rule. After cooking, return items to their labeled spot immediately.
How to Organize Corner Kitchen Cabinets for Maximum Accessibility
Maximum accessibility starts with one decision: how you want to access the corner. Some corner cabinets have a visible shelf path you can reach from the front. Others are blind corners where you cannot see or touch the back without rearranging everything. If you treat both like “regular cabinets,” you will keep getting that same stuck feeling every time you need the baking tray you know is in there.
For most kitchens, the smartest approach is to build an access ladder: front edge equals frequent use, and the hard-to-reach zones are reserved for overflow and infrequently used items. In practice, that means you organize by what you grab during a normal week, not what you bought when the cabinet felt empty. The easiest way to make that real is a quick audit and a temporary staging area on the counter.
Before you buy any inserts, measure the cabinet openings and the “reach path.” Measure inside height, width, and depth, and note what the door clears when it opens. If you have a blind corner, measure how far you can actually reach from the front without stretching or hitting the back panel. Write those numbers down, because lazy Susans and pull-out units have mounting requirements that vary by cabinet style.
Then clear the cabinet completely and split items into categories you’ll reuse later:
- everyday cooking tools
- baking supplies
- small appliances and accessories
- backup staples (extra flour, extra sugar, extra wraps)
- infrequently used cookware
Once everything is out, you’ll see the real problem immediately. It’s rarely “lack of space,” it’s “lack of reachable volume.” The goal is to turn that unreachable volume into controlled access so you are not forced into rummaging.
Installing Lazy Susans and Rotating Trays
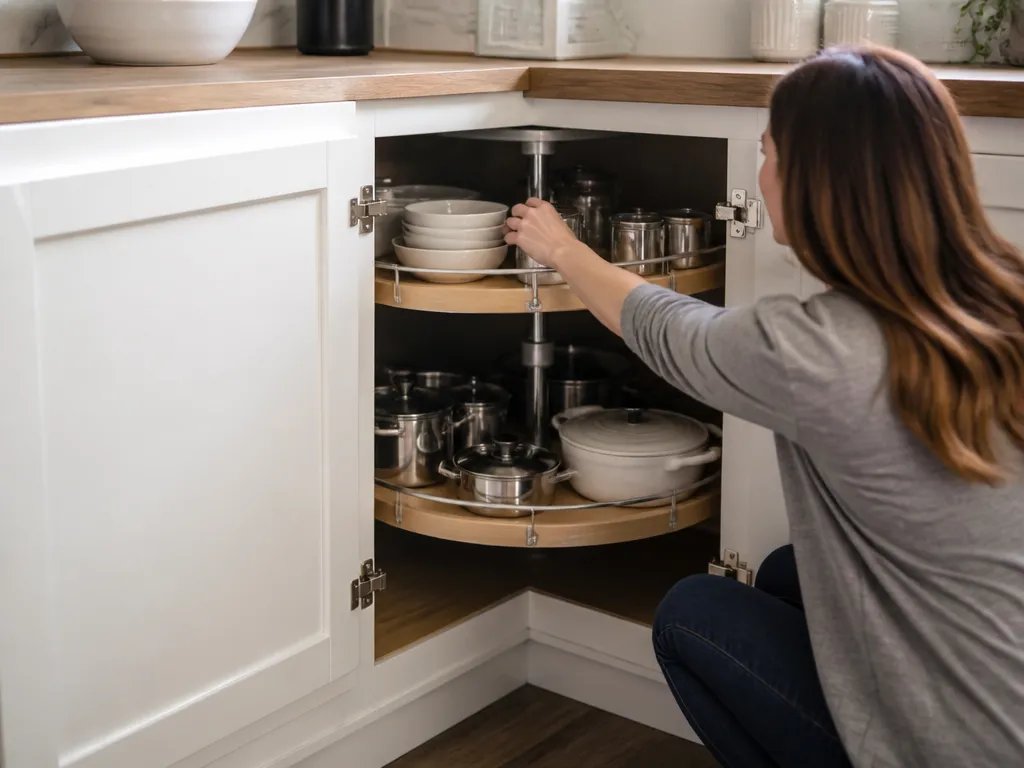
Lazy Susans work best when your corner cabinet holds items that are roughly round or can be stacked in a way that rotates cleanly. Think oils, vinegars, baking sprinkles, bulk snack containers, or even nested lids if you can keep them stable. If your cabinet is a blind corner, a rotating tray can be the simplest upgrade because it reduces the “back-of-cabinet problem” to a spin-and-grab motion.
Start by testing whether rotating storage will clear your existing door and frame. Open the cabinet and check whether the door hits the tray path or whether the tray will rub the face frame. In a lot of real kitchens, the limiting factor is not the cabinet depth, it is how the hardware mounts to the sides and what the door sweep allows.
Next, choose the right style based on what you store. Standard lazy Susans are good for shelves that are already “open enough” to hold a round platform. Rotating trays can be better for smaller top-of-cabinet sections or for organizing cans and jars when you want visibility and easy rotation. If you’re storing items that wobble, use non-slip matting on the platform, not just for noise reduction, but to keep items from drifting when you rotate.
| Corner Insert Choice | Key Spec / Fit Detail | Best For |
|---|---|---|
| Round lazy Susan platform | Fits circular motion under the shelf | Oils, vinegars, jarred ingredients, spices in clusters |
| Rotating tray (rectangular) | Maximizes flat-face visibility | Cans, boxed mixes, grab-and-go snacks |
| Pull-out rotating tray (hybrid) | Slides then rotates | Deep blind corners with bulky items |
Installation is also where people get into trouble. If your lazy Susan mounts to an internal shelf, remove that shelf temporarily and confirm you can attach the brackets where your shelf supports allow screws. Dry-fit the hardware first, then adjust before you fully tighten anything. Once mounted, do a “reach test” with the heaviest items you plan to store, then confirm the rotation is smooth with real weight, not just empty.
Utilizing Pull-Out Shelving and Swing-Out Units
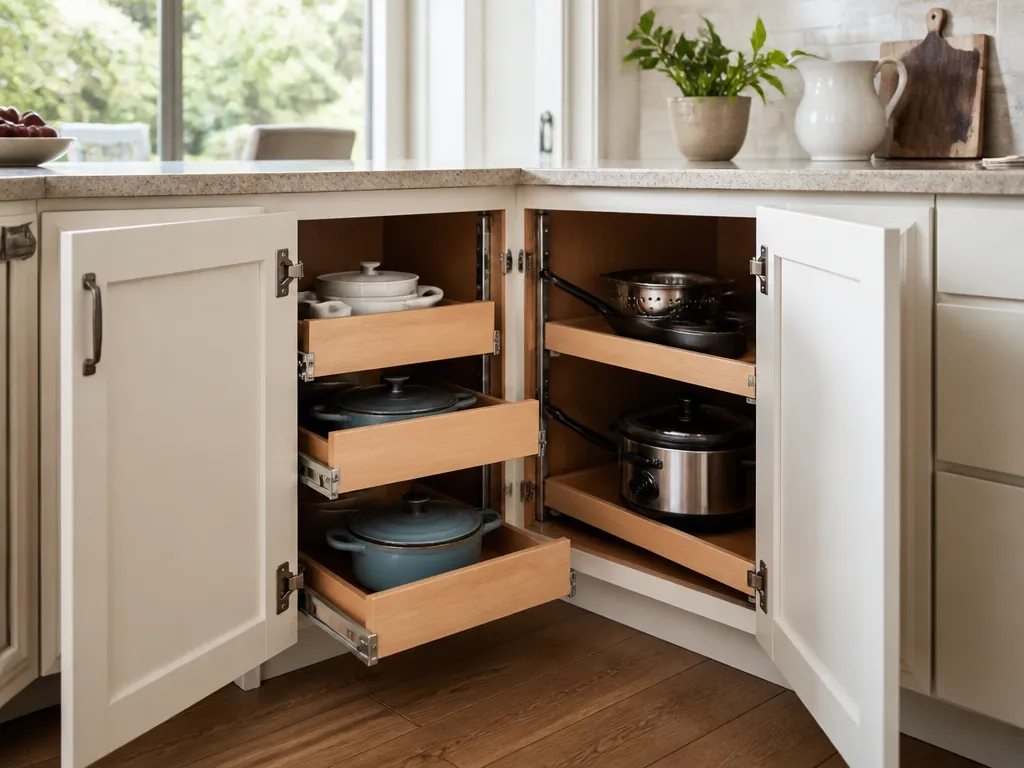
Pull-out shelving is the most reliable fix when your corner cabinet is deep and you need direct access without twisting your arm around the back. Instead of reaching into a dark corner, you pull the shelf out until the entire front row is visible. For a lot of households, this one change removes 80 percent of the frustration because you stop treating the corner like a treasure hunt.
Swing-out units are the companion option when you have a corner that behaves more like an awkward “side” than a true blind corner. If your corner cabinet door opens and gives you a clear arc, a swing-out can put items on the “front” half automatically. The key is that the swing-out has to clear the door and stay aligned during normal use, so measure the motion path before you commit.
To choose between pull-outs and swing-outs, think about your worst item. What is the item you always struggle to grab? If it is a sheet pan, roasting rack, or mixing bowl stack, pull-out shelves are usually easier because they slide straight out. If it is smaller, lighter goods like baking cups, wrap, and foil, a swing-out can be faster to access and more compact.
Install planning matters, especially with pull-out rails. Make sure your mounting surface is solid and that the rails can be fastened without hitting cabinet walls at weird angles. If your cabinet has older particleboard shelves, you may need to reinforce mounting points so screws don’t strip after a few months of use.
After installation, load the first shelf as a “test rack.” Use lighter items first, then gradually add heavier cookware. Once loaded, confirm you can pull the shelf out without catching, close the door without forcing, and access the back items without re-bunching bins.
Implementing Vertical Dividers and Tension Rods
Vertical dividers and tension rods are your best tools when you want to stop corner chaos without installing major hardware. They work especially well if your corner cabinet is usable but awkward, for example, where you can reach the front but the storage disappears behind it. Dividers turn one big space into lanes, so tall items do not topple into the void.
Dividers also help you solve a frequent corner cabinet issue: lids and small accessories. Lid stacks fall over, spatulas get jammed, and measuring tools end up mixed with duplicates. With vertical dividers, you can create dedicated lanes for items that share height ranges, like baking liners, cookie cutters, and measuring cups.
Tension rods are surprisingly useful for “in-between” storage when shelves have enough depth for upright placement. Use them to hang or anchor light items like cutting boards, but verify they can handle weight and won’t shift when you pull bins forward. Place them where your items can slide behind the rod rather than jam against it.
A common mistake is using tension rods for heavy cookware. If the rod flexes, you will create a new failure point, and the cabinet becomes harder to organize over time. Keep rods for lighter, manageable storage like wrap rolls, foil sheets (secured in a sleeve), or small tools.
Here’s a simple way to build lanes inside a corner cabinet shelf:
- Choose one shelf for “tall items.”
- Choose one shelf for “short items.”
- Use dividers to keep each category in its lane.
- Keep only one bin width per lane so bins slide without fighting the sides.
Selecting Storage Containers for L-Shaped Layouts
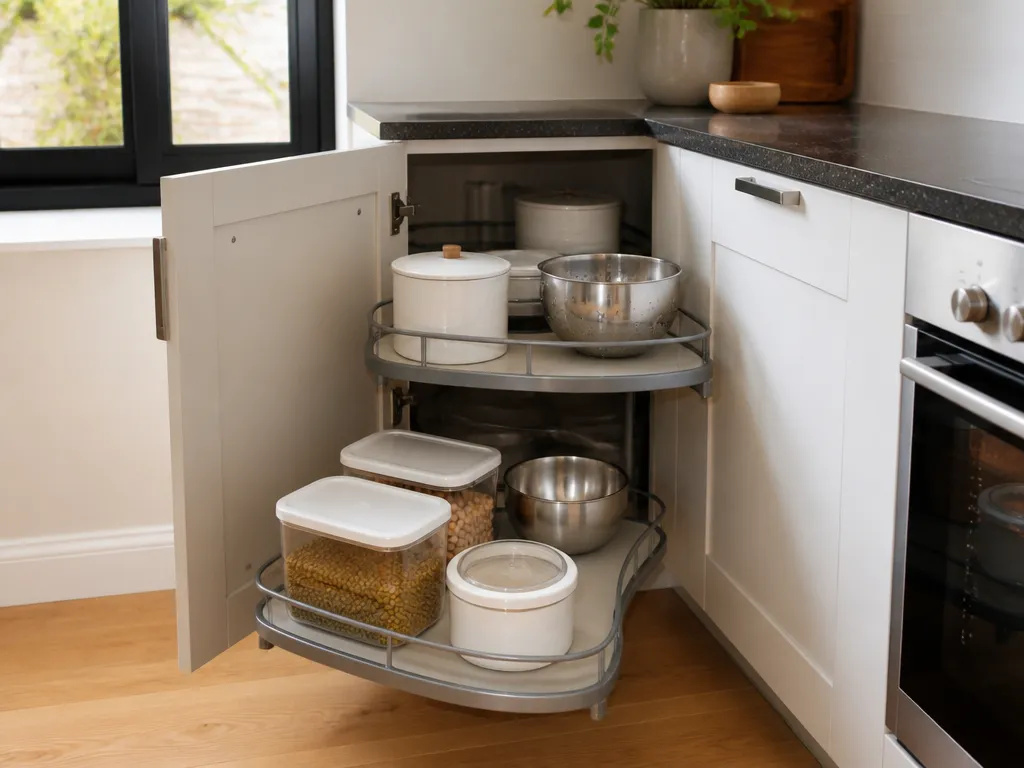
Container choice is where corner organization either holds up or collapses after one week. For L-shaped layouts, the goal is consistent “container geometry” so items fit predictably as you pivot from one side to the other. If your bins are too big, they catch. If they are too small, they shift and create dead pockets.
Use containers that match your access style. For pull-outs and shelves, use bins with handles or lips that let you pull them out without tipping. For rotating storage, choose containers with flat bottoms and stable sides so they don’t wobble as the tray rotates. If you have glass containers, avoid stacking them in a way that forces you to lift heavy stacks frequently.
You also want container labels to do the heavy lifting. Without labeling, corner cabinets become “memory storage,” and most people do not remember what’s in the back. Label by category and use the cabinet zone, like “Baking – cups,” “Wrap – foil + parchment,” or “Backstock – pasta.” That reduces decision-making when you’re busy.
A quick rule that saves time: containers should be sized so you can reach the entire bin by pulling it out, not by fishing for one item at a time. If you can only access half a bin in the corner, you need smaller bins, or you need an insert that changes the access path.
Maximizing Cabinet Door Space for Small Items
Cabinet doors are “free real estate” in corner setups, because they swing and rotate into your view. The trick is to use the door for items that are small enough not to fall when you open the cabinet, and light enough that the door mount stays solid over time.
Use door-mounted organizers for things you reach with the door open: frequently used spices, measuring spoon sets, small packets, and labels for your food pantry. In many corner cabinets, the door is the only predictable part you can access instantly, so you want the door to carry the daily-use load.
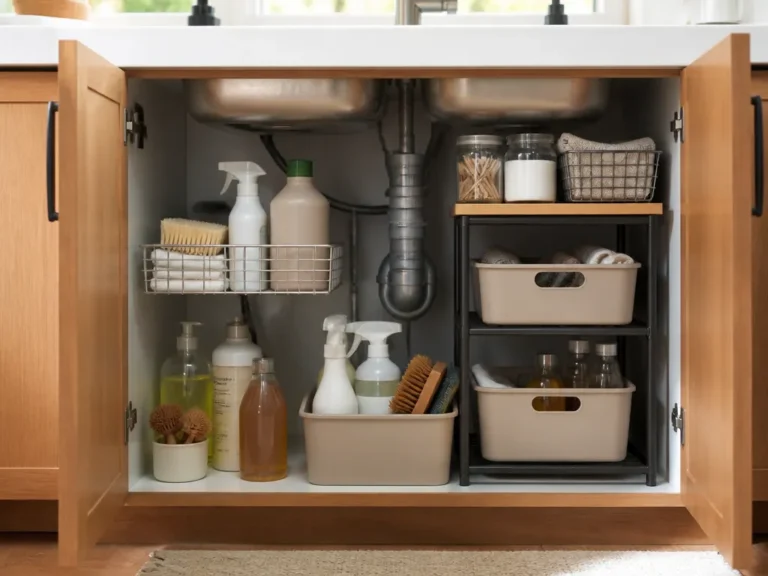
Choose a door organizer style based on weight and item shape. Wire baskets work well for lighter items that need airflow, like spice jars in a stable cluster. Clear bins help you identify contents quickly, but make sure they sit securely so they do not slide. For small tools, peg-style or rail-style holders can prevent clutter from spreading into the cabinet interior.
Managing Inventory for Infrequently Used Cookware
Infrequently used cookware belongs in the corner because you only need it occasionally, but only if you store it in a way that doesn’t punish you later. The big mistake is stacking cookware too tightly and then hiding it behind items you use every week. When that happens, you create “work every time” storage, which defeats the whole purpose of organizing.
Start by sorting cookware by real frequency, not by how much you like it. If a dutch oven comes out twice a year, it can live deeper in the cabinet. If you use a roasting pan monthly, it deserves better access.
Then choose a storage method that keeps cookware stable and easy to lift out. Use a dedicated bin or stack for sheet pans and baking trays, dividers or vertical separation for lids and pans, and a “top zone” or “front zone” for the most-accessible infrequently used pieces.
FAQ
What is the best way to organize corner kitchen cabinets without remodeling?
The best no-remodel approach is to start with a complete empty-out, then reorganize by access. Add door organizers for small items, use vertical dividers for lids and measuring tools, and keep your most-used items in the easiest-to-reach zone. If you can’t reach into the back easily, consider a rotating tray or pull-out unit since that changes the access path more than shelves alone.
What should I store in a corner cabinet so it stays easy to access?
Store items by frequency and shape. Keep daily tools in the most reachable area, then move infrequently used cookware to deeper zones. Use vertical lanes for lids and accessories, and keep “grab-and-go” categories like wraps or foil in bins that slide out cleanly.
Are lazy Susans or pull-out shelves better for corner cabinets?
Pull-out shelves are usually better when the cabinet is deep and you need direct visibility, because you pull the shelf out and see the full contents. Lazy Susans are best when items can sit stably and rotate without wobbling.
How long does it take to reorganize a corner cabinet for the first time?
Plan on 2-4 hours for the first pass because you need to empty the cabinet, measure, and test container fit. Hardware upgrades like pull-outs or installing trays can add additional time depending on your cabinet setup and mounting surfaces.
What’s the most common mistake people make when organizing a corner cabinet?
The most common mistake is treating a hard-to-reach corner like a standard shelf. People stuff too many items into fixed positions, then everything becomes hard to retrieve. The fix is simple: match storage to access, use bins and labels, and set zones by frequency.